29 Inspiring DIY Dining Room Projects to Transform Your Space Effortlessly
Transforming your dining room into a space that reflects your personal style can be both rewarding and enjoyable. If you’re looking to revitalize this essential area of your home without breaking the bank, you’re in the right place! In this listicle, we present 29 Inspiring DIY Dining Room Projects that will breathe new life into your dining space effortlessly. From charming centerpieces and creative wall art to innovative furniture makeovers, each project is designed to spark your creativity and inspire a fresh approach to your dining room decor. Weather you’re a seasoned DIY enthusiast or just starting your journey, you’ll find practical tips, step-by-step guidance, and ideas that cater to various aesthetics and skill levels. Get ready to roll up your sleeves and discover how easy it can be to create a dining room that truly feels like home!
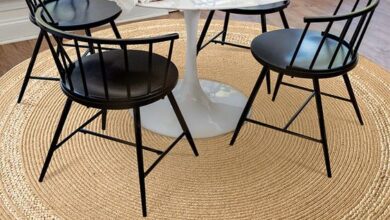
Revamp your Chairs with a Fresh Coat of Paint
Revamping your dining room chairs with paint can breathe new life into your entire space. Whether you have old, wooden chairs or metal ones, a fresh coat can transform them from drab to fab within a few hours. Choose a colour that complements your dining room’s palette or opt for something bold that makes a statement. Don’t be afraid to get creative—consider using stencils, patterns, or even a two-tone effect to add personality.
Before you start, prepare your chairs by cleaning them thoroughly and sanding any rough surfaces. Apply a primer if you’re painting over dark colors, followed by your chosen paint. For a professional finish, use a spray paint or a high-quality brush for even coverage. Once dry, seal your paint with a clear topcoat to enhance durability against scratches and stains. Here’s a quick overview of essential supplies you’ll need for this DIY project:
| Item | Description |
|---|---|
| Chairs | Old or outdated chairs ready for a makeover. |
| Paint | Your chosen color (acrylic, chalk, or spray paint). |
| Primer | Helps the paint adhere better, especially on dark woods. |
| Brushes or Spray Gun | for applying the paint evenly. |
| Clear Topcoat | To protect the paint finish and increase durability. |
With just a little effort and creativity, you can redefine the aesthetic of your dining area, turning your chairs into stunning focal points that spark conversation and delight your guests. Experimenting with textures and finishes will also set your space apart, ensuring that every meal becomes an occasion to admire your handiwork.
Create a Statement Wall with Removable Wallpaper
Transform your dining room into a personal haven by designing a statement wall with removable wallpaper. This trend allows for endless creativity and personalization without the commitment of traditional wallpaper. Imagine featuring a bold floral pattern or a sleek geometric design that instantly elevates your space. Removable wallpaper is also perfect for renters or those who like to switch things up frequently,as it peels away easily without damaging the walls. With a variety of textures and colors available, you can seamlessly tie your dining room decor together or create a striking focal point.
To begin, select a wallpaper that reflects your style and complements your existing furnishings. Use the following tips for a accomplished installation:
- Prepare Your Walls: Ensure the surface is clean and smooth for optimal adhesion.
- Measure Carefully: Take accurate measurements to avoid wastage and ensure a perfect fit.
- Use a Level: Align your wallpaper correctly to prevent crooked edges.
After the wallpaper is up, consider incorporating textural elements like wooden frames or decorative shelves to enhance the overall look. Your statement wall will not only be a conversation starter but also a reflection of your unique taste.
Transform Your Table with a Custom Table Runner
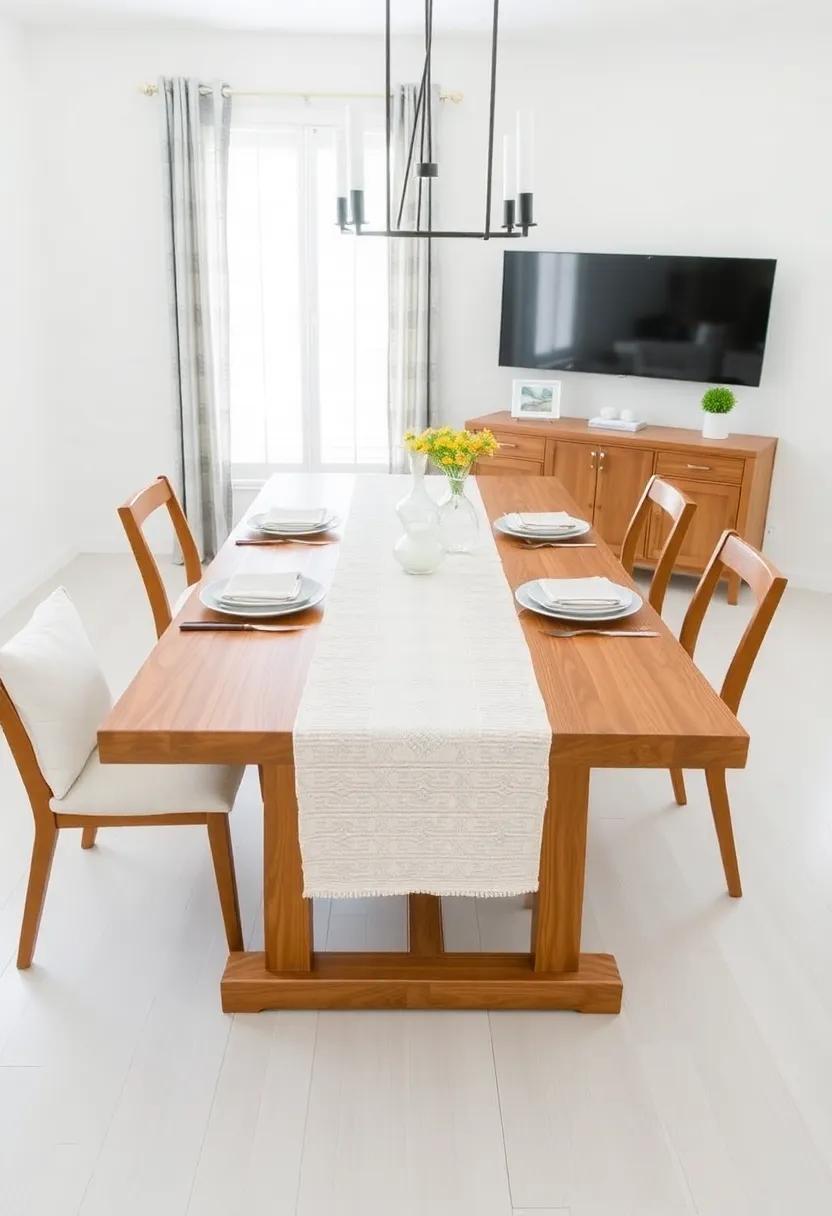
Elevate your dining experience with a personalized table runner that reflects your unique style and adds a splash of color to your table. Choosing the right fabrics, patterns, and colors can entirely transform the mood of your dining area. Start by selecting fabrics that complement your existing décor; consider natural materials like linen, cotton, or burlap for a casual, rustic vibe, or opt for silk or satin for a touch of elegance. With a few simple sewing skills,you can create a custom piece that sets the scene for every meal,from casual brunches to formal dinners.
Getting creative with your table runner offers endless possibilities. Here are a few ideas to spark your inspiration:
- Stenciled Designs: Use fabric paint or spray to add eye-catching patterns.
- Patchwork: Combine various fabrics and colors for a bohemian flair.
- Seasonal Themes: Create runners that reflect seasonal changes — floral prints for spring, autumn leaves for fall!
- Personalized touch: Add monograms or family names for a personal touch.
To make your project even more fun, consider organizing a DIY table runner-making party with friends. gather your materials, foods, and drinks, and let creativity flow while you craft lovely pieces together. Here’s a simple comparison table to help you choose the right runner style based on your dining theme:
| Dining theme | Runner Style | Material |
|---|---|---|
| Casual Family Meal | Colorful Stripes | Cotton |
| Romantic Dinner | Elegant Lace | Silk |
| Festive Gathering | Seasonal Print | Polyester |
| Rustic Brunch | Natural Textures | Burlap |
Makeover Old Furniture with Decoupage Techniques
Transforming your dining room furniture doesn’t have to break the bank. One of the most creative methods is decoupage,where you can breathe new life into old pieces with just a few materials. Start by selecting your favorite patterned paper or fabric that complements your dining room theme. Floral designs, geometric patterns, or even vintage magazine cutouts can set a specific tone for your dining area. Ensure the surfaces are clean and primed; then, cut your chosen images to fit the furniture. Using a mod podge or similar adhesive,apply a layer on the surface,place the cutouts carefully,and finish with another coat to seal everything in. This technique not only revives your furniture but also adds a personalized touch that reflects your style.
Choosing the right furniture pieces to decoupage can substantially impact the overall aesthetic of your space. Consider these furniture types for an effective makeover:
| Furniture item | Decoupage Idea |
|---|---|
| Dinner Table | Cover the tabletop with a mosaic of different patterned paper for a vibrant look. |
| Chairs | Decoupage the seat and even the backrest with coordinating designs for an eclectic vibe. |
| Sideboard | add a chic touch with vintage book pages for a rustic feel; a clear coat will enhance durability. |
Enhancing your dining room with decoupage isn’t just about the final look; it’s also a rewarding creative process. Experimenting with layering different textures and finishes can produce stunning results that bring a unique flair to your dining experience. The best part? You can easily switch things up with the seasons or whenever you’re due for a change, making your decor as dynamic as your style.
Add Warmth with Handcrafted Fabric Placemats
Transform your dining experience and add a touch of personality to your table settings by incorporating *handcrafted fabric placemats*. These versatile pieces do more than just protect your table; they bring an inviting charm and warmth to your dining space. Imagine placing vibrant, patterned placemats that harmonize with your decor, each one telling its own story. Whether you opt for soothing pastels or bold designs, the fabric can serve as a reflection of your style and the mood you wish to convey during meals.
To create your own handcrafted fabric placemats, consider exploring fabrics like *cotton, linen,* or *canvas* for a durable and appealing look.Here are some ideas to ignite your creativity:
- Patchwork Charm: Sew together fabric scraps to create unique placemats that showcase your personality.
- Quilted Touch: Use quilting techniques to add texture and warmth, making your dining setup feel cozy.
- Natural Elements: Incorporate materials like burlap or jute for a rustic vibe that complements earthy decor.
- Seasonal Themes: Craft different sets for various occasions, from autumn leaves to festive holiday motifs.
For inspiration, try looking at the following simple color combinations that can elevate your placemats:
| color combo | Vibe |
|---|---|
| light Blue & White | Fresh & Serene |
| Deep Red & Gold | Warm & Festive |
| Green & Natural Linen | Earthy & Elegant |
| Pastel Pink & Mint | Soft & Playful |
By blending your creativity and design sensibilities, you can easily craft beautiful handcrafted fabric placemats that not only protect your table but also serve as stunning centerpieces that impress your guests while keeping everything warm and inviting.
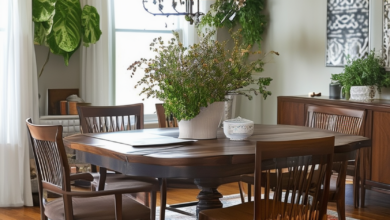
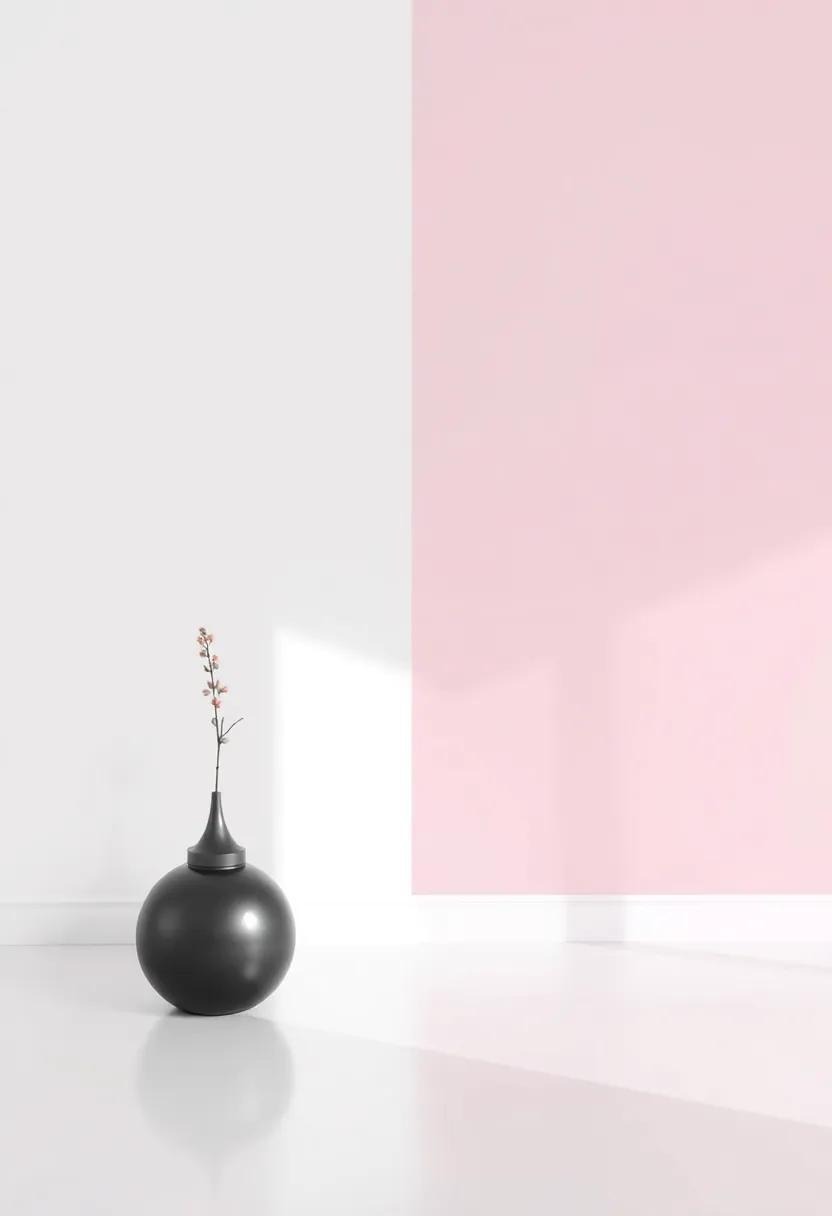
Design a Unique Centerpiece with Seasonal Florals
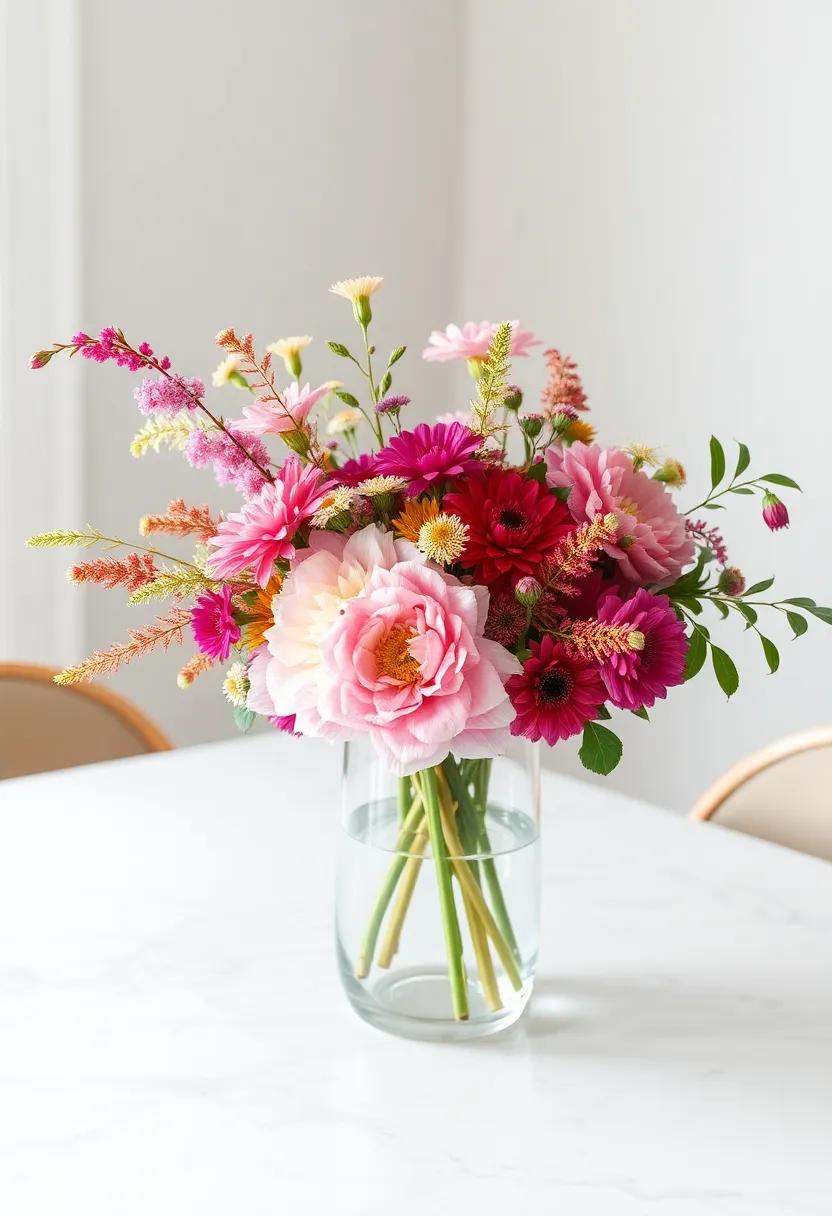
Elevate your dining experience by creating a stunning centerpiece that highlights the beauty of seasonal florals. Begin with a simple but elegant base, such as a wooden or ceramic bowl, to provide a rustic charm. Fill it with an assortment of flowers that correspond to the current season, incorporating elements like:
- Spring: tulips, daffodils, and cherry blossoms
- Summer: Sunflowers, zinnias, and daisies
- Autumn: Chrysanthemums, dahlias, and marigolds
- Winter: evergreens, poinsettias, and holly
For added creativity, mix in some natural elements like pinecones or stones for texture, or use colored sand as a base for a beachy summer vibe. Consider the use of varying heights among the flowers to create visual interest; tall stems in the center with smaller blooms cascading around them will establish depth. To finish your masterpiece, you could wrap the base with twine or ribbon that matches your floral color scheme, tying everything together beautifully.
| Season | Flower Choices | Decorative Touches |
|---|---|---|
| Spring | Tulips, Daffodils | Pastel ribbons |
| Summer | Sunflowers, Zinnias | Sandy base |
| Autumn | Chrysanthemums, Dahlias | Pinecones |
| Winter | Evergreens, Poinsettias | Twinkly lights |
Install Floating Shelves for a Stylish Display
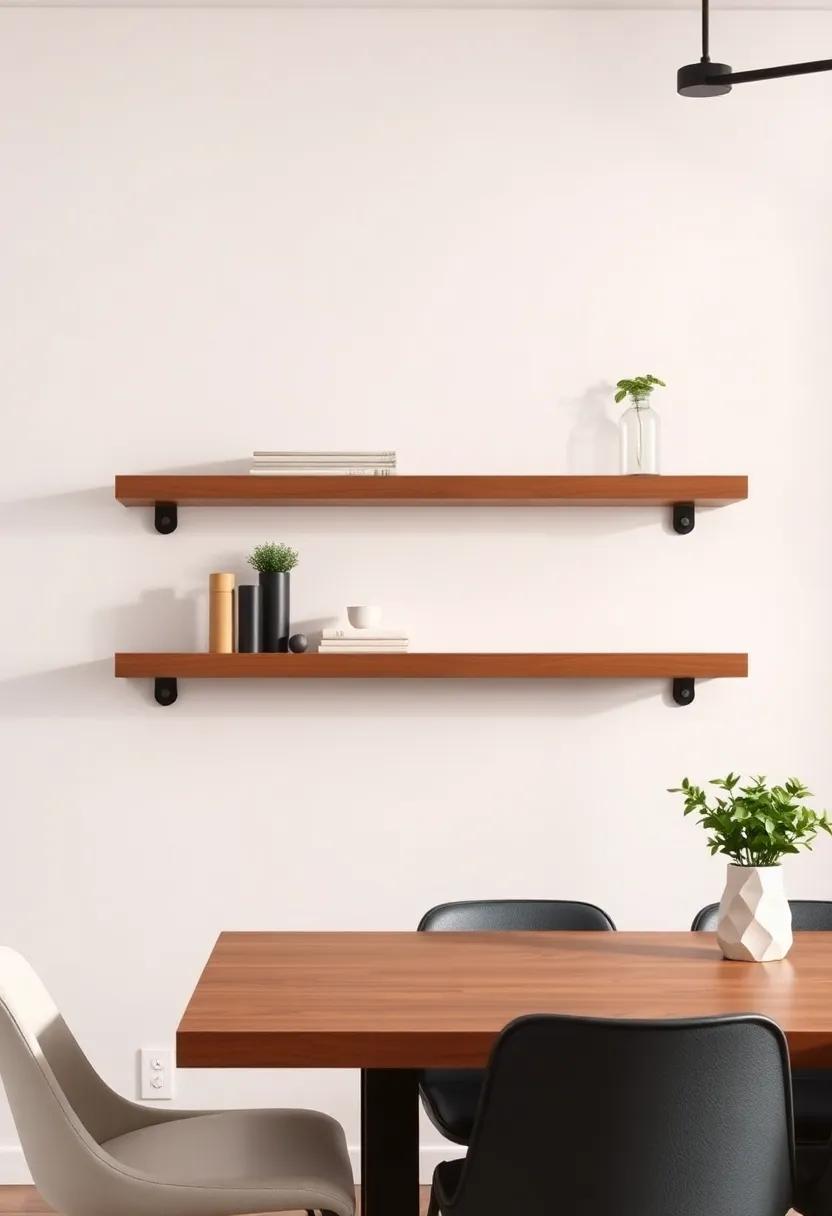
Elevate your dining room aesthetics by incorporating floating shelves that not only save space but also showcase your unique style. Crafting these minimalist shelves is a simple DIY project that can transform a plain wall into an eye-catching focal point.Consider selecting wood grains or colors that complement your existing décor. Once installed, you can arrange various items to reflect your personal taste.Here are some display ideas to inspire you:
- Artistic Centerpieces: Place small sculptures or framed artworks that resonate with your dining theme.
- Green Touch: Add potted plants or succulents to infuse life and color into the space.
- Culinary Display: Showcase your favorite cookbooks or stylish dinnerware for a functional yet aesthetic touch.
To ensure your floating shelves blend seamlessly into your dining room,consider the dimensions and spacing when planning the installation. It’s best to follow a cohesive alignment that can draw the eye across the room.Utilize brackets or hidden supports to maintain that sleek, floating appearance. Creating a balanced arrangement can also make a significant impact—think in terms of symmetry and color coordination. Here’s a simple table to help you plan the dimensions of your shelves:
| Component | Recommended Size |
|---|---|
| Shelf Length | 24-48 inches |
| Shelf depth | 6-12 inches |
| Height from Floor | 60 inches (or eye level) |
| Gap Between Shelves | 12-18 inches |
Craft Personalized Coasters from Cork or Wood
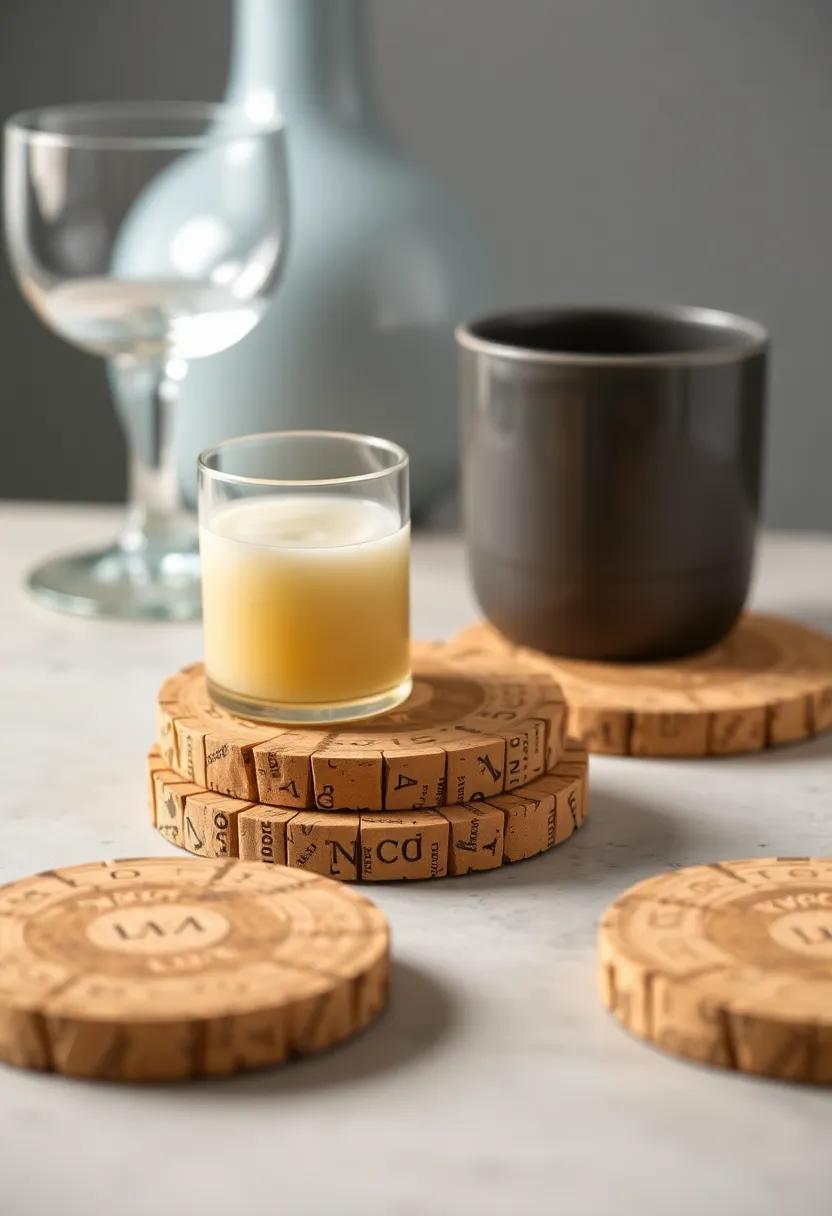
Elevate your dining experience by creating stunning personalized coasters using cork or wood. Not only are these coasters functional, but they also add a touch of elegance to your table settings. With just a few materials and some creativity, you can design coasters that reflect your personality and style. Consider these creative ideas to get you started:
- Monogrammed Designs: Engrave your initials or family name onto wooden coasters for a classic look.
- Artistic Imprints: Use acrylic paints to create abstract designs, floral patterns, or even landscapes on cork coasters.
- Photo Coasters: Print favorite memories or family trips on textured paper, adhere them to wooden circles, and seal for a durable finish.
- Themed Coasters: Design coasters that match your dining room decor or specific seasonal themes, such as holiday motifs or summer vibes.
To ensure the longevity of your coasters, consider applying a protective sealant once your design is complete.You can easily customize the size and shape of your coasters, from classic square to whimsical round shapes. For a fun project, gather your friends or family for a DIY coaster-making night, complete with snacks and good music. Below is a simple table to help you plan your coaster project:
| Material | Tools Needed | Time required |
|---|---|---|
| Cork Sheets | Scissors, craft Knife | 1-2 hours |
| Wood Slices | Wood Laser Cutter or Stencil | 2-3 hours |
| Acrylic Paints | Paintbrushes, Sealant | 1 hour (drying time not included) |
Upcycle Vintage Suitcases into Chic Side Tables
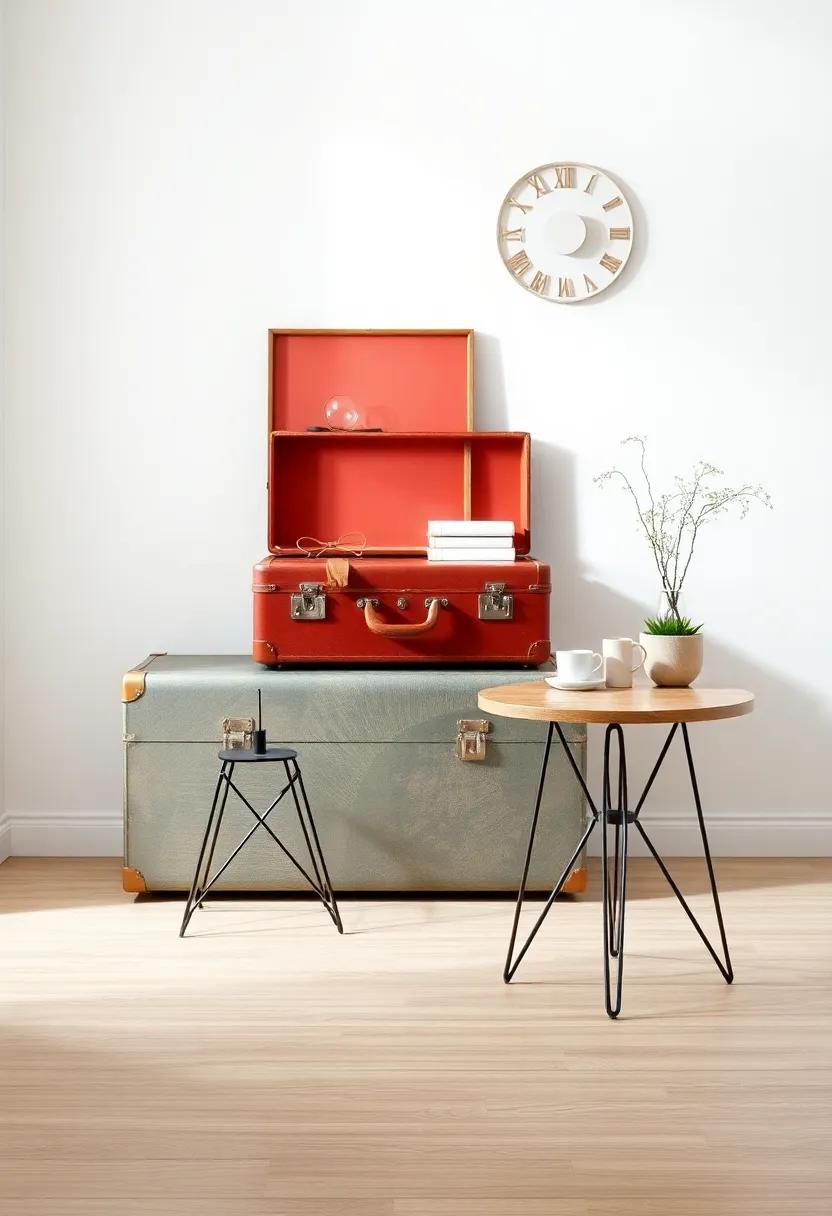
Turning vintage suitcases into chic side tables is not only a clever way to recycle but also an exciting prospect to bring character into your dining room. These stylish pieces can serve as unique storage and display options while adding a nostalgic touch to your decor. To start this project, you’ll need a couple of sturdy suitcases in various sizes, preferably with interesting patterns or colors. Once you have your suitcases, consider the following tips to enhance their new life as side tables:
- Stacking: Layer smaller suitcases on top of larger ones for a fun, tiered look.
- Legs or Feet: Add short wooden or metal legs to elevate the suitcases, giving them a modern twist.
- Finishing Touch: Paint or refresh the travel stickers for a more cohesive design that matches your dining room palette.
To ensure stability without sacrificing style, consider reinforcing the inside of the suitcase with a plywood base, especially if it’s going to support heavier items like books or decorative objects. Another option is to modify the interiors; line the insides with soft fabric or wallpaper for a personalized touch that peaks out when the suitcase is open. Here’s a quick overview of essential materials and their uses:
| Material | Use |
|---|---|
| Vintage Suitcases | Primary structure for the side table. |
| Plywood | Base for added support. |
| Paint/Sealer | To refresh and protect the surface. |
| Legs | To elevate the suitcase and create a stable table. |
Drape Twinkling Fairy Lights for a Magical Ambiance
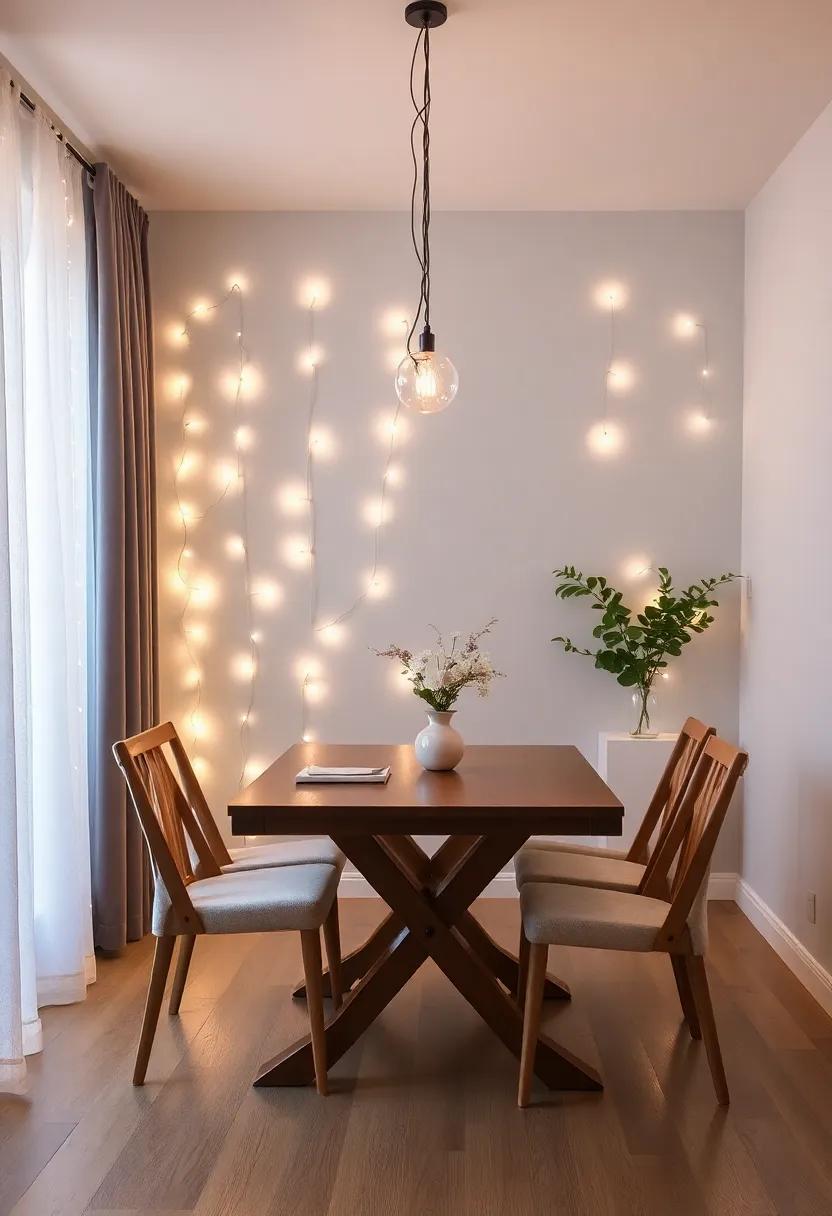
Drape your dining room with twinkling fairy lights to instantly elevate the atmosphere and create a cozy,enchanting space. These beautiful lights can be used in a variety of ways, allowing you to express your style and personality. Consider the following ideas:
- Above the Table: Hang strands of fairy lights above your dining table to serve as a whimsical centerpiece that captures attention and wraps diners in warmth.
- On Shelves: Wrap lights around bookshelves or decorative shelves to highlight your favorite items, adding depth and interest to your decor.
- In Plants: Tuck fairy lights into potted plants or floral arrangements for a magical touch that brings nature to life, especially in the evening.
When incorporating these sparkling additions, consider soft, warm-colored lights to create a more inviting atmosphere. You can even create a DIY backdrop by draping them along a wall or window for a stunning visual effect. Here’s a quick comparison table of light choices to help guide your selection:
| Light type | Best For | Color Options |
|---|---|---|
| LED Fairy Lights | Energy Efficiency | Warm White, Multicolor |
| Traditional String Lights | Classic Vibe | White, Blue, Yellow |
| Solar Fairy Lights | Outdoor Use | White, Color-Changing |
With these enchanting lights, your dining room will resonate with charm, making every meal a delightful experience. Whether it’s a casual dinner or a festive gathering, these decorative elements will ensure your space remains inviting and magical.
Reupholster Dining Chairs with Trendy Fabrics
Breathing new life into your dining chairs is easier than you might think,especially with the vast array of trendy fabrics available today.Whether you’re aiming for a bohemian vibe or sleek modern elegance,reupholstering your chairs can infuse your dining space with personality. Start by selecting fabric that resonates with your room’s aesthetic—think velvets for luxury, canvas for a laid-back feel, or print fabrics for a pop of color. Don’t forget to incorporate some of the latest trends, like inspired floral patterns or geometric designs, which can create a stunning contrast against your existing decor.
To tackle this project, gather a few essential tools: a staple gun, scissors, and a measuring tape. First, remove the old upholstery and padding, then measure your chair seats to ensure an accurate fit for the new fabric. Lay out your fabric choice flat and cut accordingly, allowing a few extra inches for staples. Secure the fabric tightly beneath the seat using the staple gun, ensuring it’s smooth and without wrinkles. For an extra touch of charm, consider adding piping or trim along the edges to give a professional finish. With just these steps, your dining chairs can become a focal point that showcases both your style and creativity!
Create a Gallery Wall with Family Photos
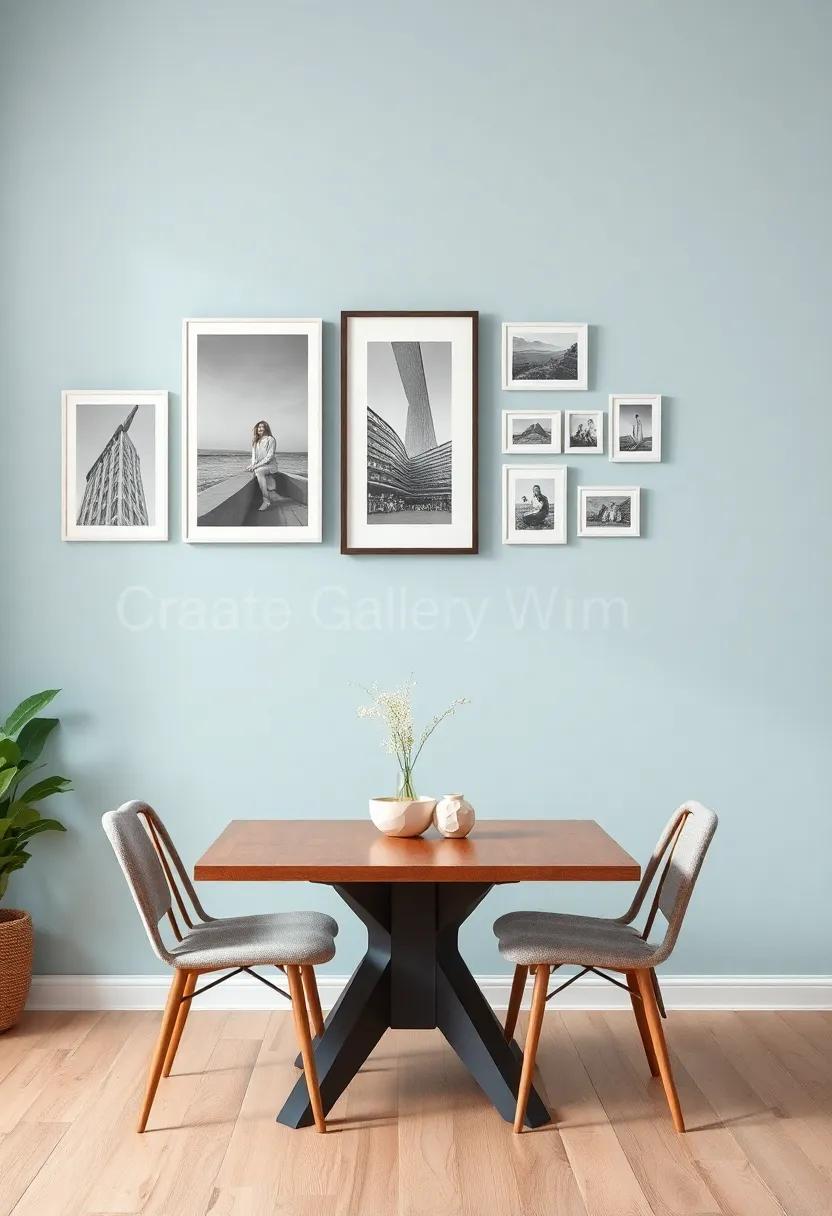
Transform your dining room into a personal gallery by showcasing treasured family moments through a curated collection of photographs.Start by gathering a mix of portrait and landscape orientation photos that represent milestones, vacations, and candid everyday life moments. Opt for a cohesive color scheme or frame style to keep the display visually appealing. Consider using wooden or metallic frames that complement your dining room’s decor, and don’t shy away from mixing textures and sizes for an engaging aesthetic.Lay everything out on the floor first to visualize the arrangement before committing to the wall.
For added impact, incorporate decorative elements that resonate with your family’s personality. Think about including items like:
- Artwork by family members
- Woven baskets or fabric pieces
- Quotes or words of inspiration
A simple yet effective layout is to arrange the photos in a grid or an organic cluster, ensuring that there is enough space between frames for a breathable look. Keep in mind that lighting plays a crucial role; position your wall near a source of natural light or consider adding small wall-mounted spotlights for a warm ambiance during evening meals.
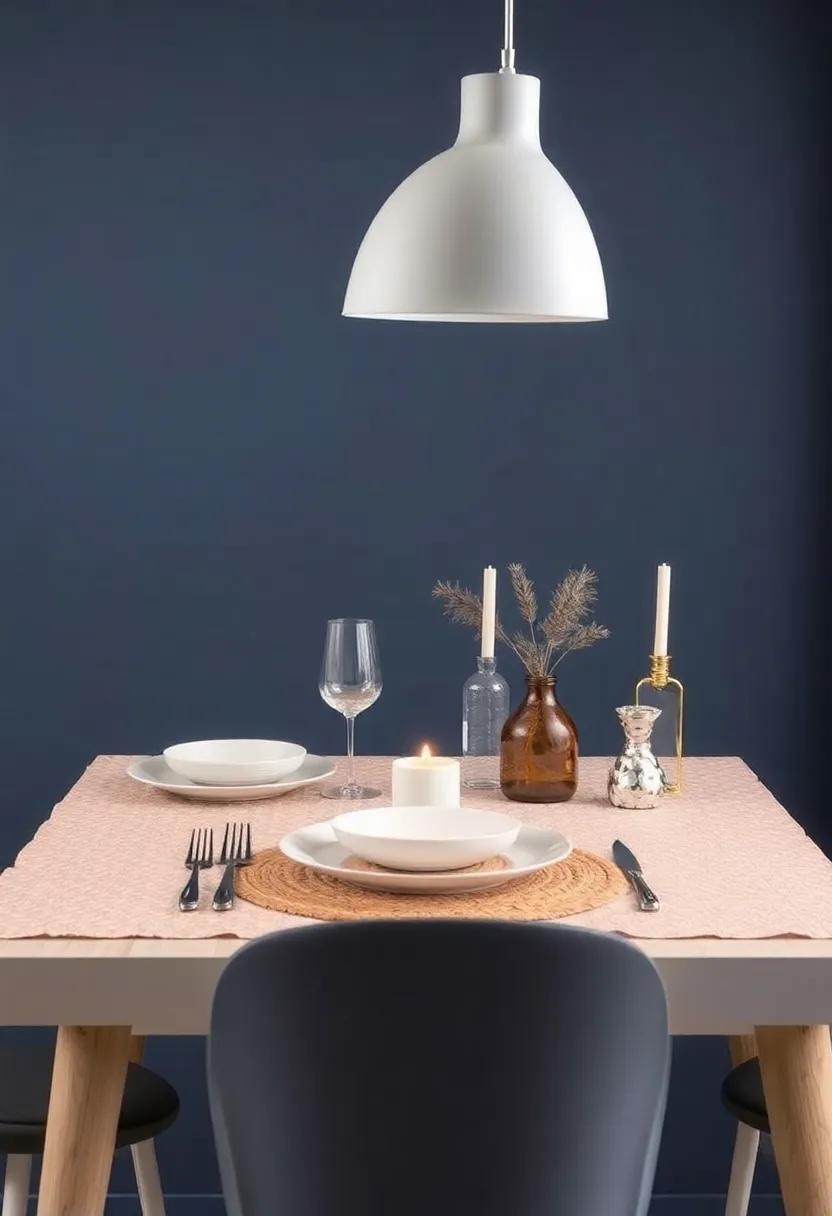
Add Texture with a DIY Fabric Tablecloth

Elevate your dining experience by crafting a custom fabric tablecloth that reflects your personal style. Whether you prefer bold prints, soft neutrals, or textured materials, a DIY tablecloth is a fantastic way to add depth and interest to your dining room. Start by selecting fabric that complements your decor—think cozy linens for a farmhouse vibe,or vibrant cottons for a pop of color. Once you’ve chosen your fabric, gather a few essential supplies:
- Fabric of your choice (enough to cover your table)
- Scissors for cutting the fabric
- sewing machine or iron-on hem tape for finishing edges
- Measuring tape to ensure a perfect fit
To create your tablecloth, measure your table and cut your fabric accordingly, adding a few extra inches for an elegant drop. If you’re not cozy sewing, don’t worry! Iron-on hem tape can give you a polished finish without the need for extensive sewing skills. For added flair, consider incorporating layers by making smaller matching placemats or napkins from the same fabric. This cohesive look ties your dining room together beautifully,and guests will appreciate the effort and unique touch.
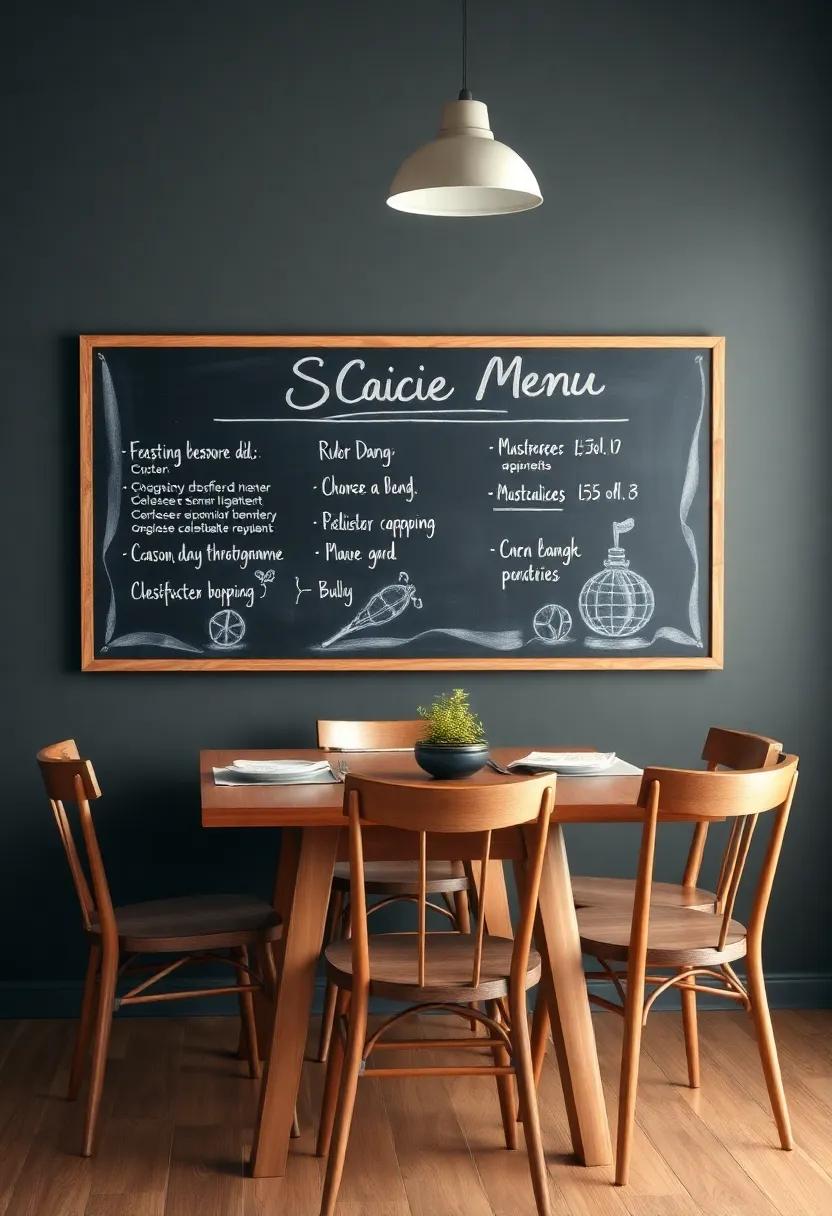
Make a Chalkboard menu for Daily Specials
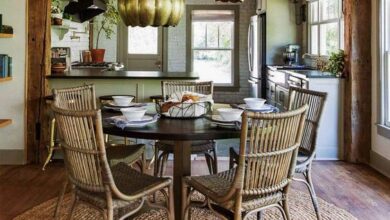
Incorporate a Rustic Wooden Bench for Extra Seating
A rustic wooden bench can serve as a stunning focal point in your dining room while providing additional seating for family and friends. With its natural charm, a wooden bench brings warmth and character that pairs beautifully with various dining table styles, from modern to farmhouse. Consider using reclaimed wood for an eco-friendly option that comes with unique textures and stories.You can either DIY the bench from scratch or find a simple design that you can customize further to match your decor.
To enhance the rustic aesthetic, adorn your bench with cozy cushions or a woven throw, ideally in earthy tones or complementary hues.Placing the bench against a wall or under a window not only maximizes your space but also creates a welcoming nook where guests can linger over dinner. Here are a few ideas to inspire your design:
- Mix Materials: Pair a wooden bench with metal accents for an industrial twist.
- Add a Centerpiece: Position a long, rustic platter with seasonal fruits or a vase of wildflowers on the bench.
- Decorative Legs: Experiment with uniquely designed bench legs to infuse more character.
elevate Your Space with Hand-painted ceramic Plates
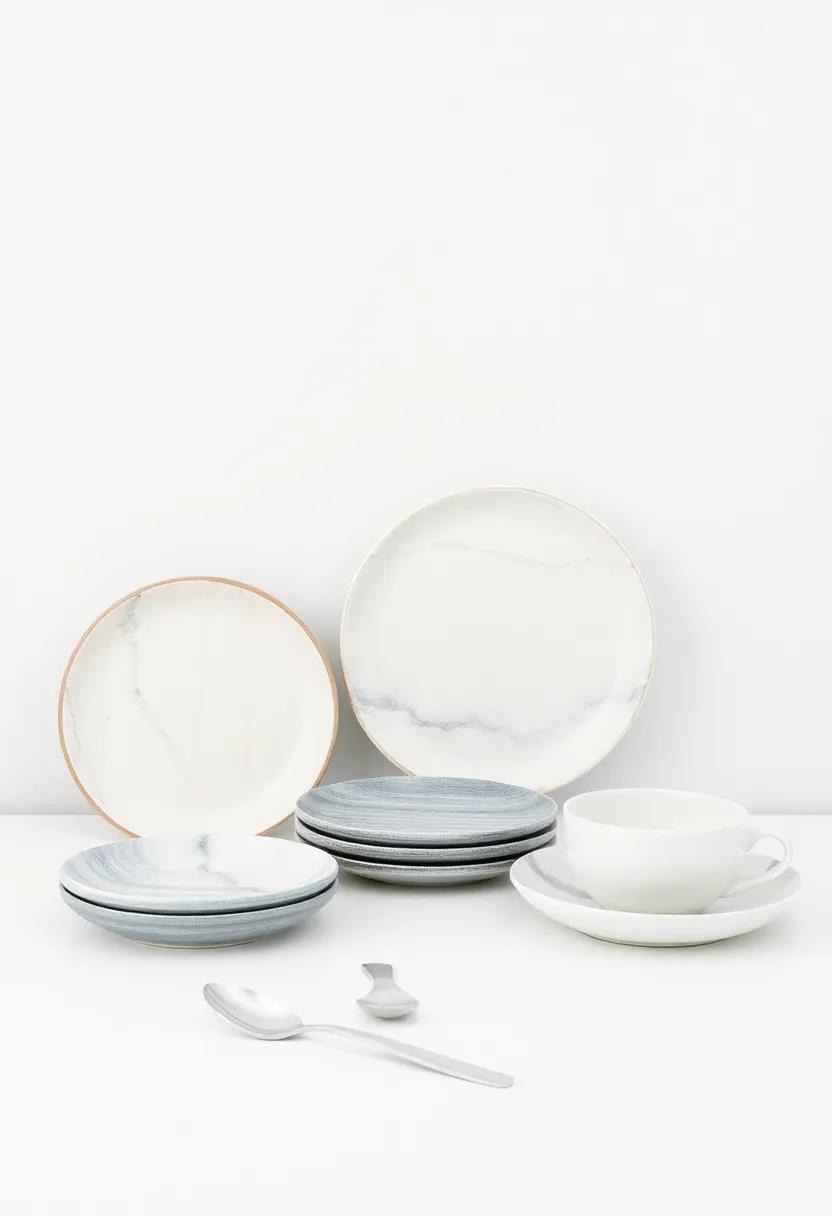
Transform your dining area into a conversation piece with hand-painted ceramic plates that showcase artistry and individuality. Not only do these plates serve as functional dinnerware, but they also double as stunning wall decorations.Create a dynamic gallery wall by mixing and matching various designs that reflect your personal style. From vibrant floral patterns to rustic, earthy tones, the options are endless!
To elevate the overall aesthetic, consider using plate hangers or shadow boxes to display your collection at different heights. This adds depth and interest to the visual presentation. You might even organize a themed dinner party where each plate tells a story, allowing guests to engage in delightful conversations surrounding the eclectic array of designs. Keep in mind that sourcing local artisans for your plates can further support your community while adding unique flair to your space.
Design a Custom Wine Rack from Pallets
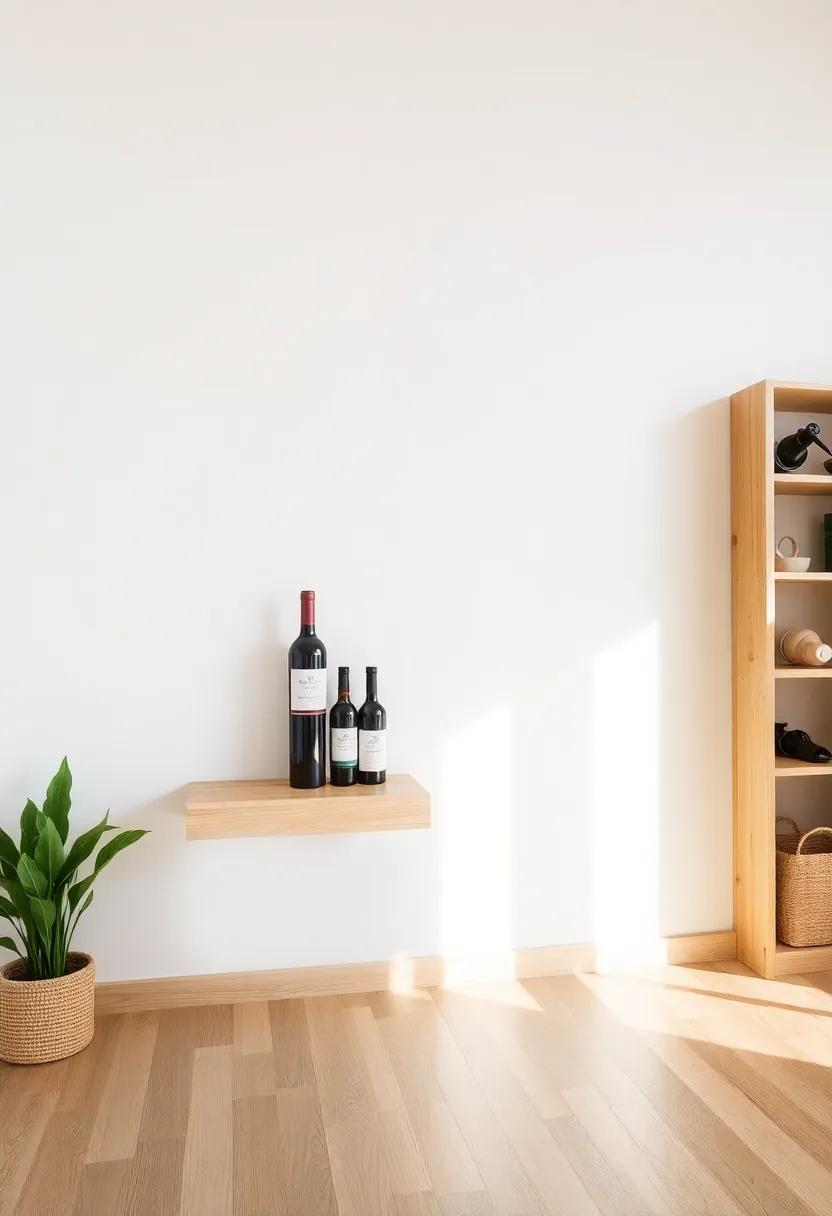
Transforming your dining room can be as simple as crafting a custom wine rack from pallets. Start by sourcing a few wooden pallets—these can frequently enough be found for free or at a low cost at local warehouses or stores. Once you have your pallets,you’ll want to disassemble them carefully,separating the slats from the base. With the slats, you can design a sleek, rustic frame that not only serves as storage for your favorite bottles but also becomes a focal point in your dining space. Consider adding hooks for wine glasses or small shelves for complementary accessories like corkscrews or decorative coasters to elevate the entire setup.
For finishing touches, apply a protective wood finish or paint to match your room’s aesthetic. If you want to go a step further, think about adding a removable wood panel with chalkboard paint to label different wine sections or customize it for special occasions. once complete, your DIY wine rack will not only reflect your personality but also provide functionality while staying true to an eco-friendly philosophy. This stylish piece will make your dining room more welcoming and encourage relaxed gatherings filled with good humors and cherished memories.
build a DIY Table from Reclaimed wood
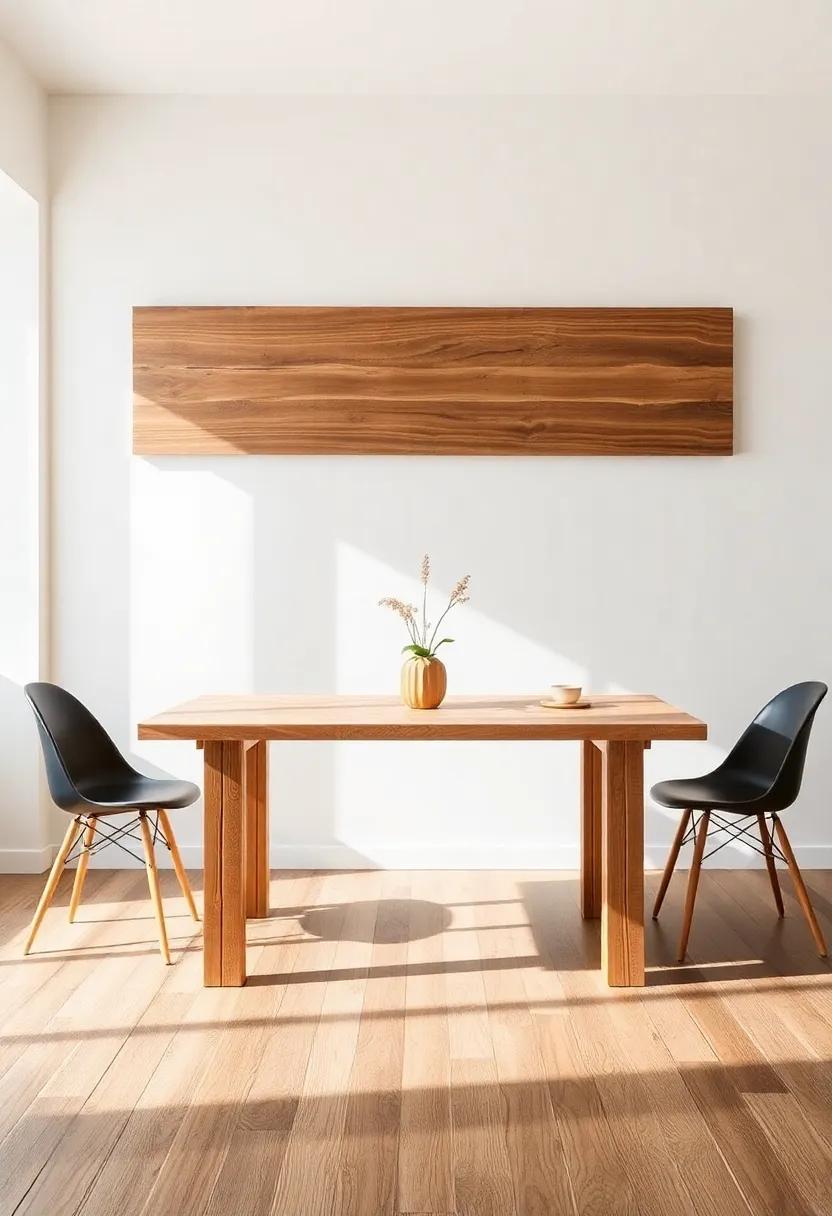
Transform your dining space with a stunning DIY table that not only showcases your style but also reflects sustainability by using reclaimed wood. Start by sourcing your materials; look for local suppliers, lumber yards, or even salvage yards that offer a variety of different woods. When selecting the wood,consider pieces with character—such as knots,grain patterns,and weathered finishes—that will eventually lend unique charm to your finished table. Take your time to measure twice and cut once; precise dimensions will ensure a harmonious design that fits your space perfectly.
As you begin assembly,incorporate bold elements that can enhance the design. Consider adding features such as:
- Angled legs: These can add a modern touch and stability to your table.
- storage shelves: Create functional space underneath for extra dining essentials.
- Finish options: Use eco-friendly stains or paints to protect the wood without compromising the surroundings.
To help visualize your project, here’s a simple overview of the steps you’ll take:
| step | Description |
|---|---|
| 1. Gather Materials | Collect your reclaimed wood and necessary tools. |
| 2. Design Layout | Sketch out your table’s dimensions and shape. |
| 3. Assemble | Construct the tabletop and legs using screws and wood glue. |
| 4. Sand & Finish | Sand down rough areas and apply a suitable finish. |
| 5. Enjoy! | Set your table and host friends for a delightful meal. |
String Up Colorful Banners or Garlands for festivity
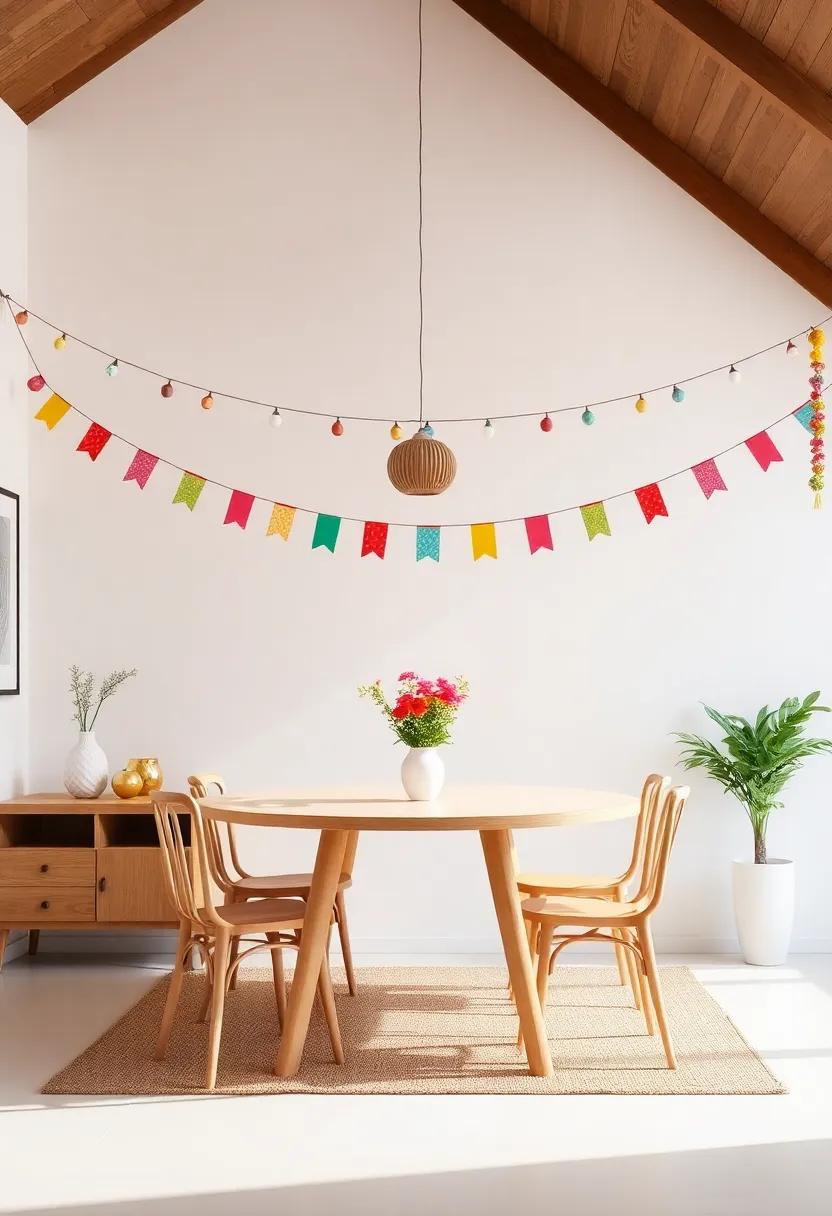
Transform your dining room into a colorful celebration with vibrant banners or garlands that radiate joy and warmth. Choose materials that align with the theme of your gathering—think whimsical paper, durable fabric, or even refreshing greenery. Stringing up your creations from the ceiling or along the walls adds dimension and cheer to your space. Experiment with various patterns and colors so that each piece brings a burst of energy. If you’re crafty, consider personalizing the banners with painted messages or individual photos for a unique touch that guests will adore.
To help you plan your festive space, here are a few ideas to brainstorm your designs:
- Rainbow Paper Banners: Layered strips of colorful paper to create an eye-catching backdrop.
- Fabric Garlands: Use fabric scraps to stitch or tie bunting; these can easily be reused for future events.
- Floral Accents: Incorporate faux or dried flowers into your garlands for a touch of nature.
- Message Banners: Spell out words like “Celebrate” or “Welcome” for a personal vibe.
- Themed Decorations: Match your banners to the occasion—think spooky for Halloween or pastel for spring gatherings!
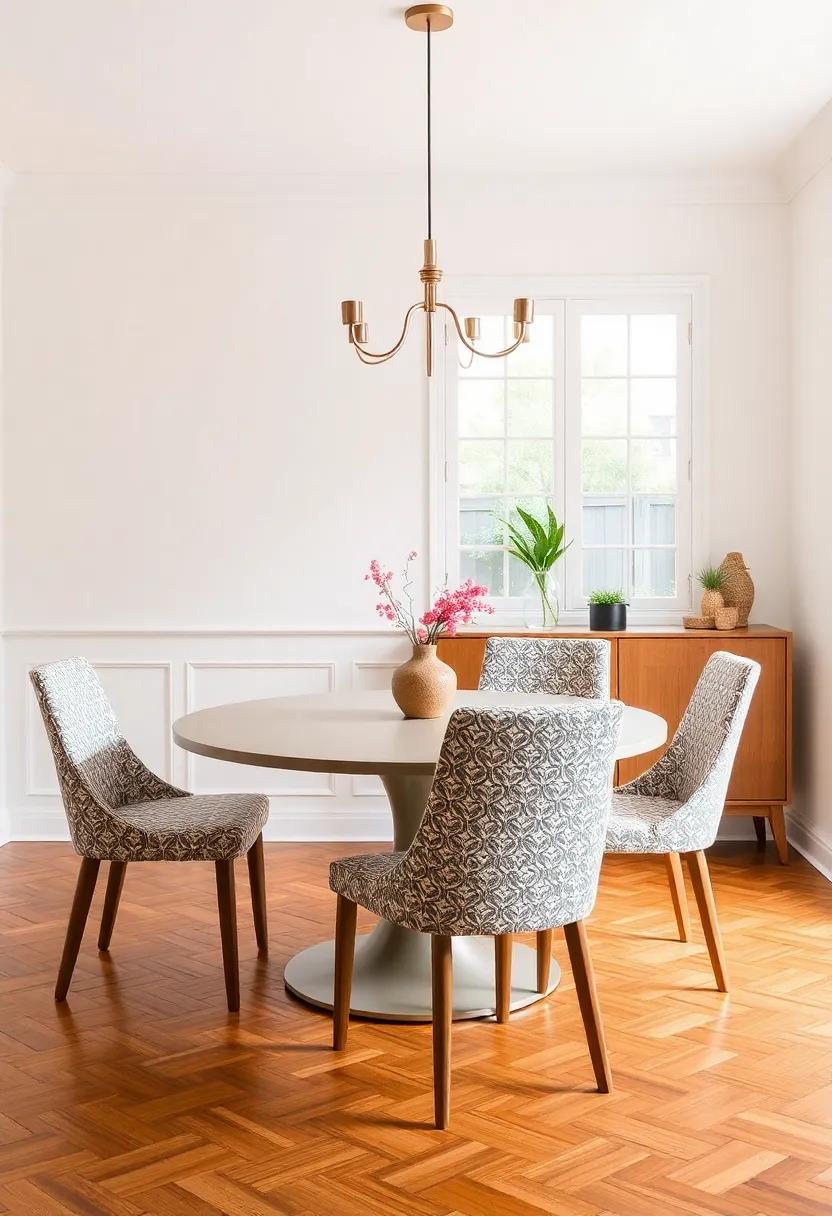
Introduce a pop of Color with upholstered Cushions
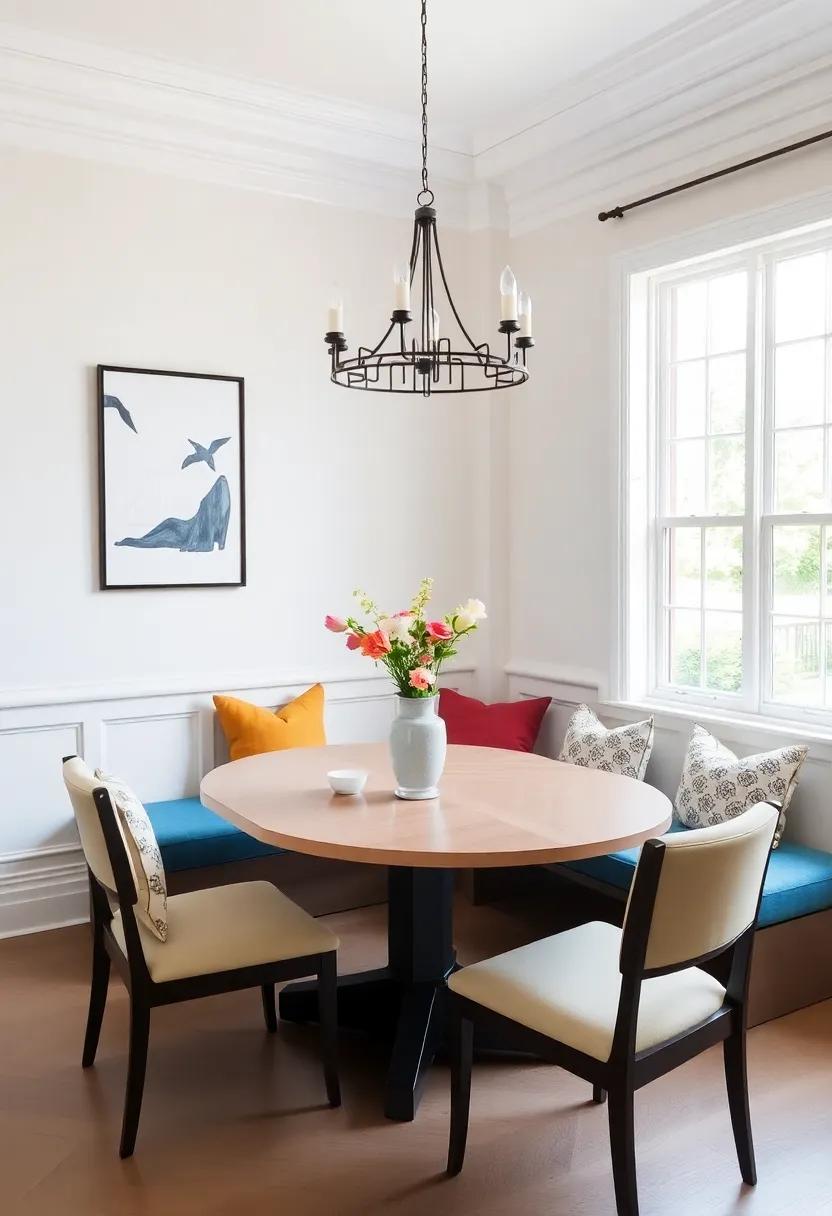
Revamping your dining room can be as simple as adding a splash of vibrant color with upholstered cushions.These versatile accessories can breathe new life into your seating arrangements. Opt for bold shades like deep turquoise, vibrant yellow, or even a rich burgundy to create a stunning contrast against neutral dining sets. The beauty of upholstered cushions lies in their ability to showcase your personality and style; whether your theme leans towards modern chic or rustic charm,there’s a fabric and color to match.
When selecting the perfect cushions, consider mixing patterns and textures for a dynamic look. Pair floral prints with geometric designs or combine soft velvet with leather to add depth to your decor. To enhance the visual appeal, think about using a variety of sizes and shapes. Add a few lumbar pillows for back support, and don’t be afraid to let your creativity shine! A carefully curated cushion arrangement not only provides comfort but also acts as a focal point that draws the eye and invites conversation.
Create a Vintage-Inspired Buffet with Old Door Panels
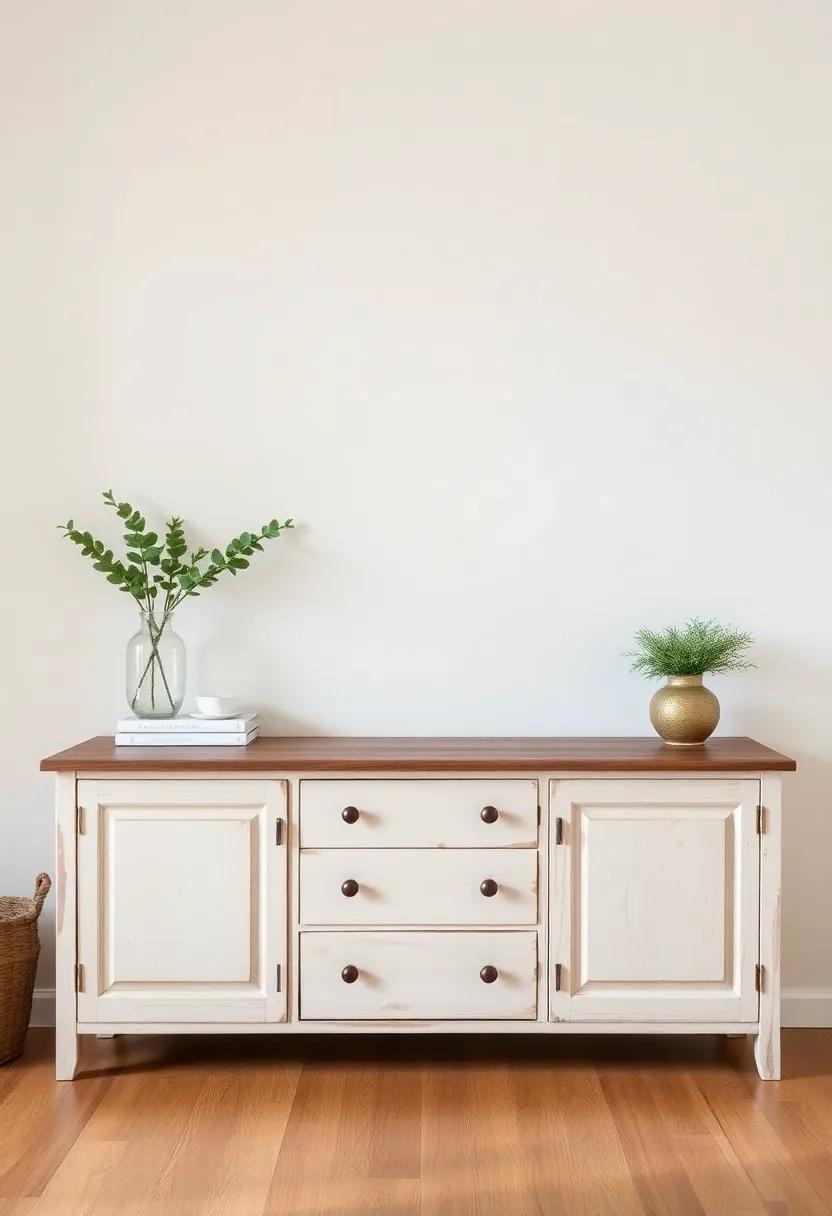
Transforming old door panels into a vintage-inspired buffet not only adds charm to your dining room but also champions sustainability by repurposing materials. Start by selecting a couple of door panels that complement each other; consider varying colors, textures, or wood types to create unique visual interest. After cleaning and sanding the panels, apply a fresh coat of paint or stain to enhance their timeless appeal. A soft pastel or classic white can evoke a rustic feel, while darker shades provide elegance. You can then attach sturdy legs—repurposed table legs or iron hairpin legs work wonderfully—to elevate the buffet and add stability.
Next, consider how you want to maximize storage and display on your new buffet.installing vintage-style hardware such as brass handles or ceramic knobs will add character and function. Adding shelves or compartments will help you optimize storage space for extra dinnerware or decorative items. Consider incorporating small, aesthetic details, like a row of mason jars filled with dried flowers or a collection of antique books to make it a centerpiece of conversation. This buffet can truly bring both functionality and style into your dining area.
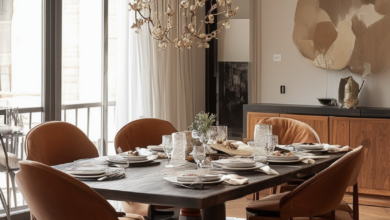
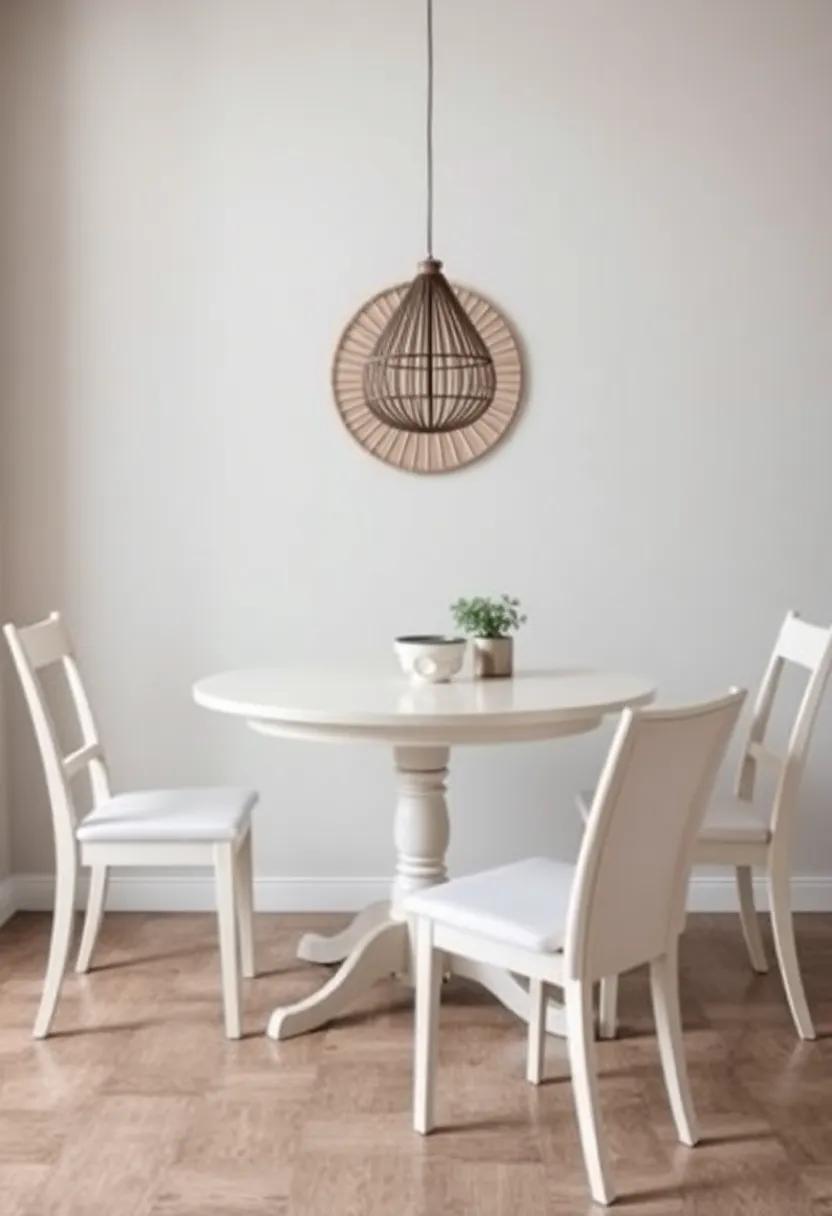
Hang Pendant Lights Over the Table for Dramatic Effect
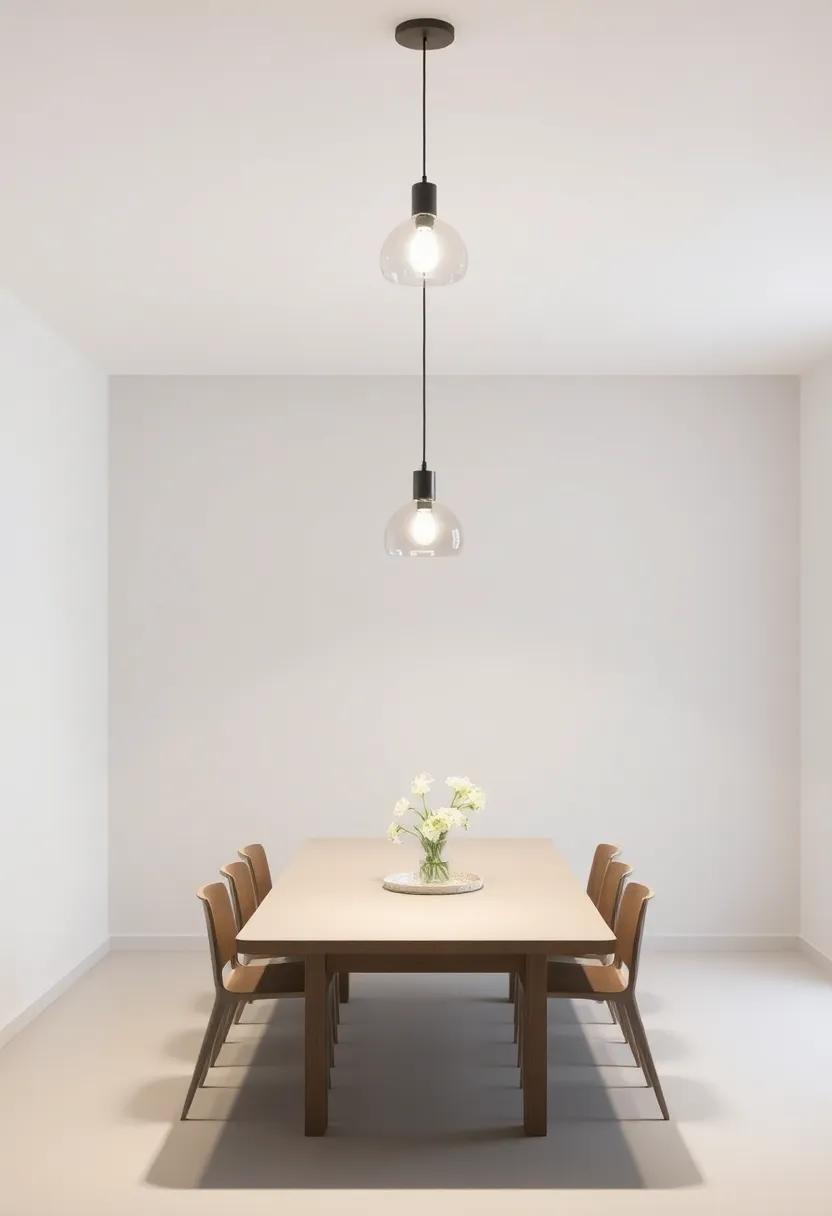
Transform your dining area with the enchanting allure of hanging pendant lights. These fixtures not only illuminate your dining table but also serve as stunning focal points that infuse personality into your space. Choosing the right pendants can make all the difference; consider the following options for an enthralling atmosphere:
- Clustered pendants: Group multiple small pendants together at different heights for a modern and dynamic look.
- Bold Designs: Opt for oversized, statement pieces that draw the eye and create drama without overpowering the room.
- Colorful Options: Choose shades that complement your dining décor, be it vibrant hues for a playful vibe or elegant metallics for a more elegant touch.
When installing your lights, remember that height matters! Aim to hang the bulbs between 30 to 36 inches above your table, ensuring they provide ample illumination without obstructing views. If you’re looking for some design inspiration, take a look at this simple comparison table showcasing different styles:
| Style | Vibe | ideal For |
|---|---|---|
| Industrial | Rustic Charm | Loft-style homes |
| Vintage | Nostalgic Warmth | Cottage or farmhouse decor |
| minimalist | Clean & Simple | Modern and streamlined spaces |
Construct a Multi-Tiered Plant Stand for Greenery
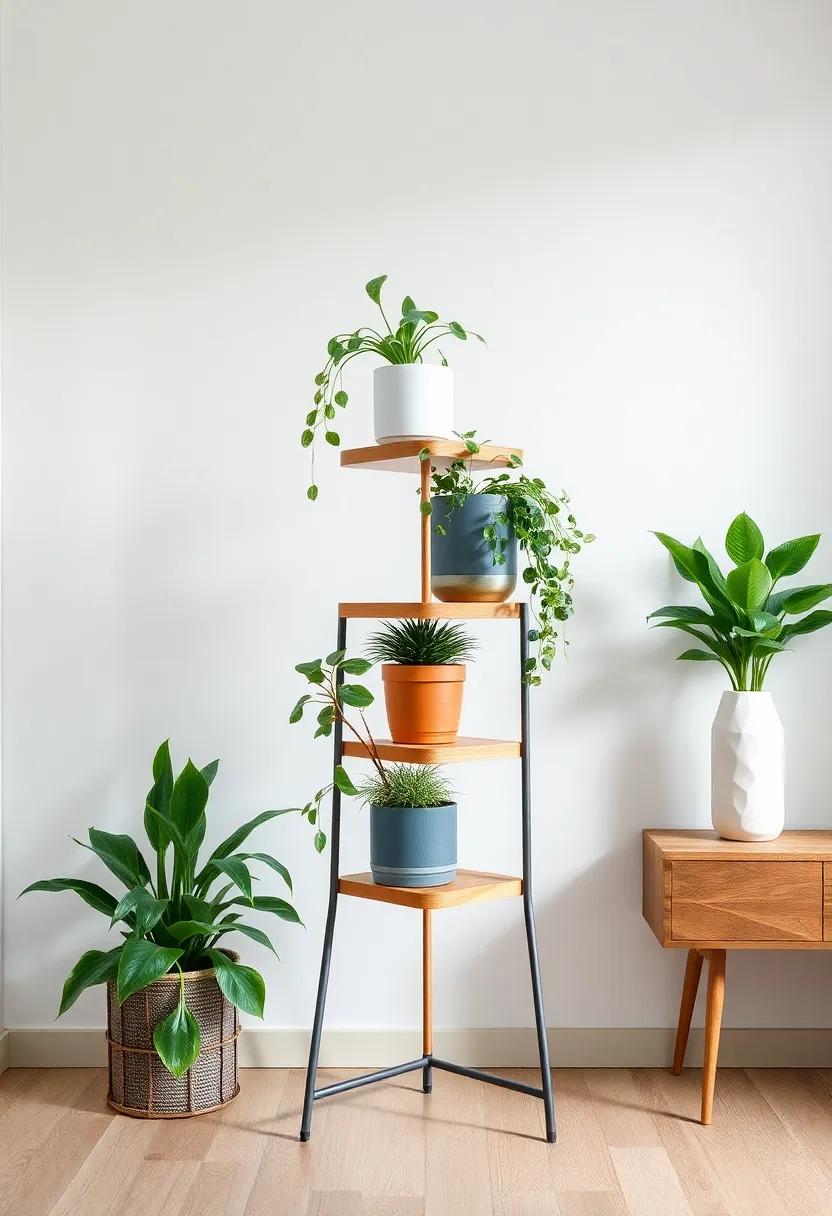
Elevate your indoor garden with a stunning multi-tiered plant stand that not only maximizes space but also adds a touch of charm to your dining room.Begin by selecting materials like wood or metal that complement your existing decor. Start with a simple design that features multiple shelves at varying heights, allowing plants of different sizes to thrive. For a smooth finish, sand down the surfaces and consider painting or staining the wood to match your dining room scheme. This functional art piece can become a stunning focal point, showcasing everything from leafy greens to vibrant flowers.
Incorporate some clever design features to enhance your plant stand’s functionality and aesthetics. Think about adding pull-out drawers for plant accessories or cute pots. Use woven baskets in between tiers for a rustic touch while also providing storage for gardening tools. If sunlight is a concern,position your stand near a window or create a shelving unit with adjustable heights to optimize light for your plants. Here’s a quick overview of potential plant choices to fit different shelves:
| Tier Level | Best Plant Options |
|---|---|
| Lower Tier | Ferns, Pothos |
| Middle Tier | Succulents, Spider Plants |
| Top Tier | Small Flowering Plants, Air Plants |
Personalize Napkin Holders with Handwritten Names

add a charming and personal touch to your dining experience by crafting unique napkin holders featuring handwritten names. This delightful DIY project can easily elevate any table setting, making it perfect for both casual family dinners and elegant gatherings.Choose from an array of materials like wood, acrylic, or even sturdy cardstock, and let your creativity shine. Use calligraphy pens or fine-tipped markers to inscribe each guest’s name, incorporating decorative elements such as flowers, leaves, or themed designs that resonate with your dining decor.
To make this craft even more enjoyable, consider hosting a napkin holder-making party with friends or family. Provide various materials and encourage everyone to personalize their own holders. Not only will this create a fun atmosphere, but it also adds a sense of community to your dining experience. For a charming presentation, arrange the holders on plates before your guests arrive, or even display them on a decorative tray at the entrance of your dining area. With just a little bit of effort, you can transform ordinary napkin holders into cherished keepsakes that will impress your guests and enhance your dining room aesthetics.
Design an Artistic Table with Resin and Inlays
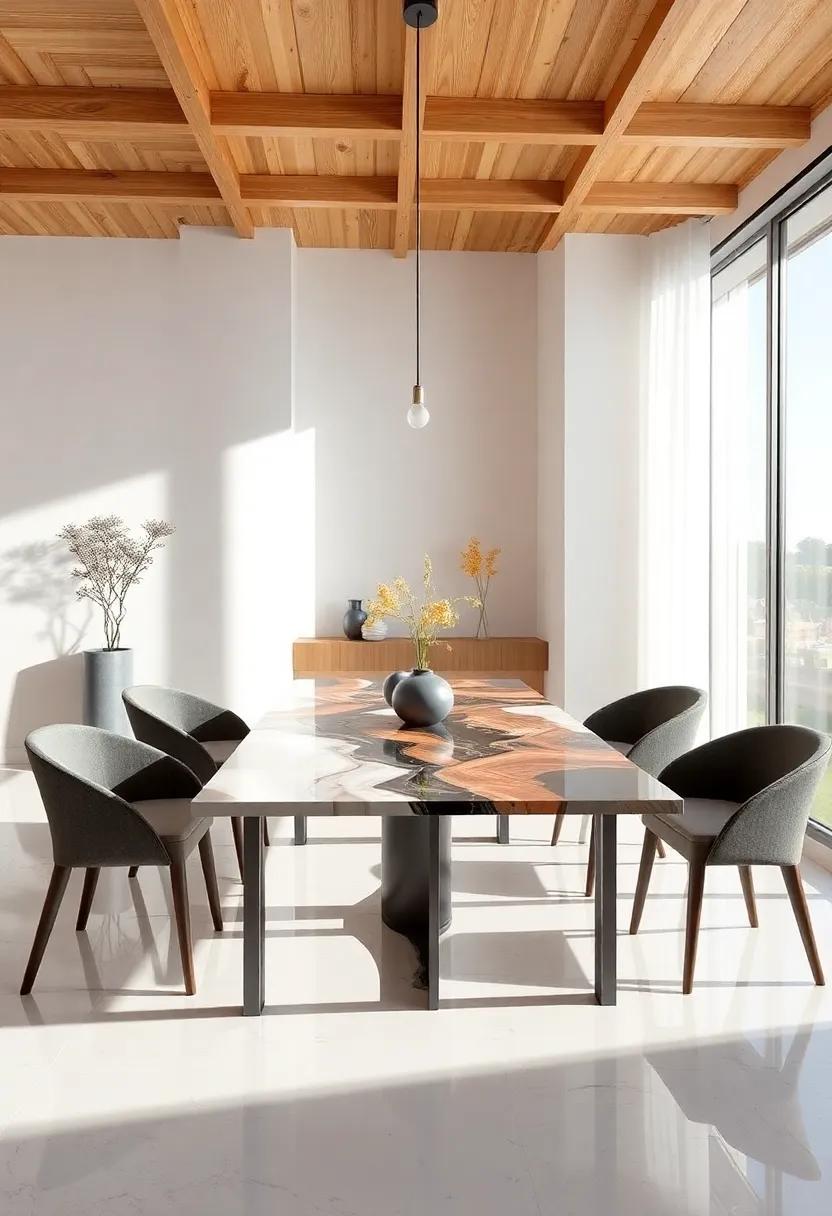
Elevate your dining experience with a one-of-a-kind table crafted from resin and inlays, transforming your space into a modern aesthetic haven. start by selecting a beautiful slab of wood as your base; choose unique grains and colors that resonate with your style. Consider these key steps:
- Resin Choice: Use crystal-clear epoxy resin to highlight the wood’s natural beauty, or experiment with colored resins for a vibrant pop.
- Inlay Ideas: Incorporate natural elements like dried flowers, seashells, or metal pieces between the resin layers to create mesmerizing displays.
- Finishing Touch: After curing, sand and polish the table surface for a sleek finish that enhances both durability and elegance.
For an added touch, think about integrating geometric or organic shapes using inlays within the resin pour. This not only adds depth but also makes the piece a conversation starter. Here’s a quick reference table for different inlay materials:
| Inlay Material | effect |
|---|---|
| Dried Flowers | Natural and rustic charm |
| Seashells | Coastal and playful feel |
| Metal Filings | Contemporary and industrial vibe |
| Colored Glass | Vibrant and artistic flair |
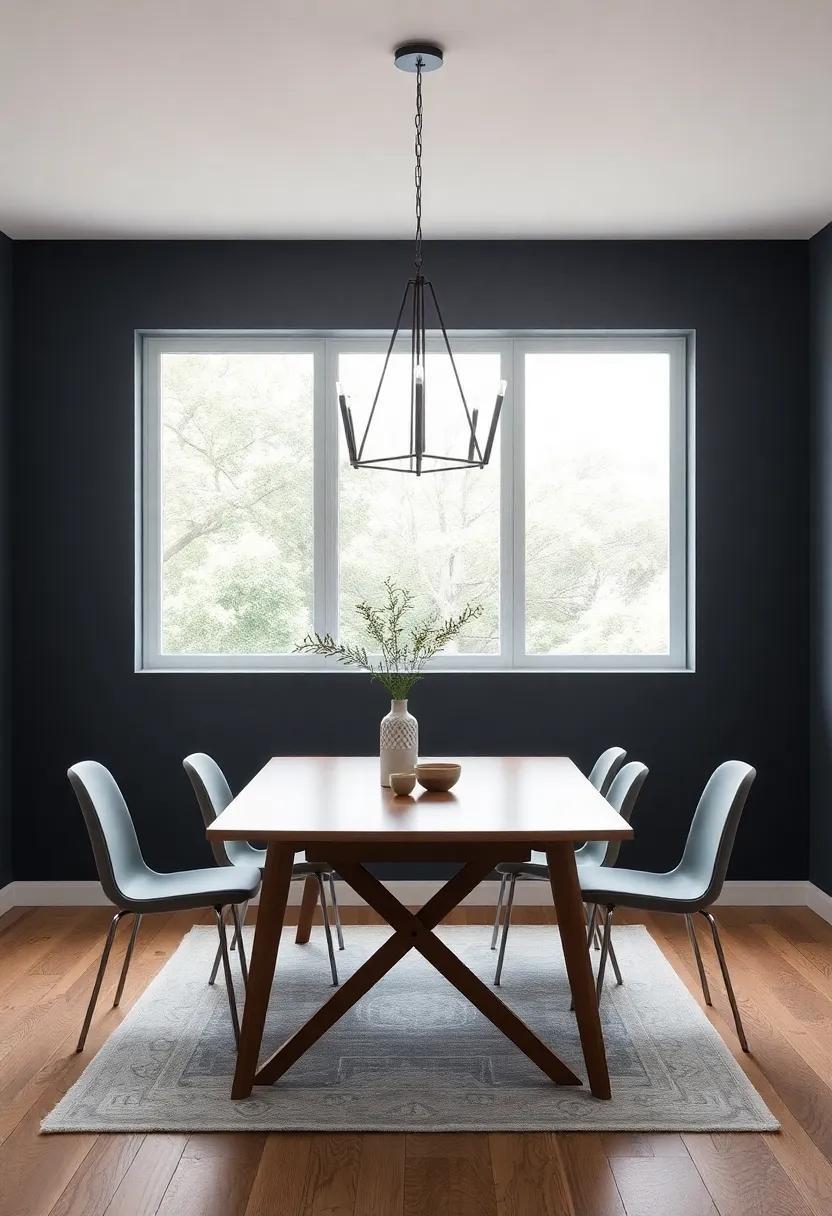
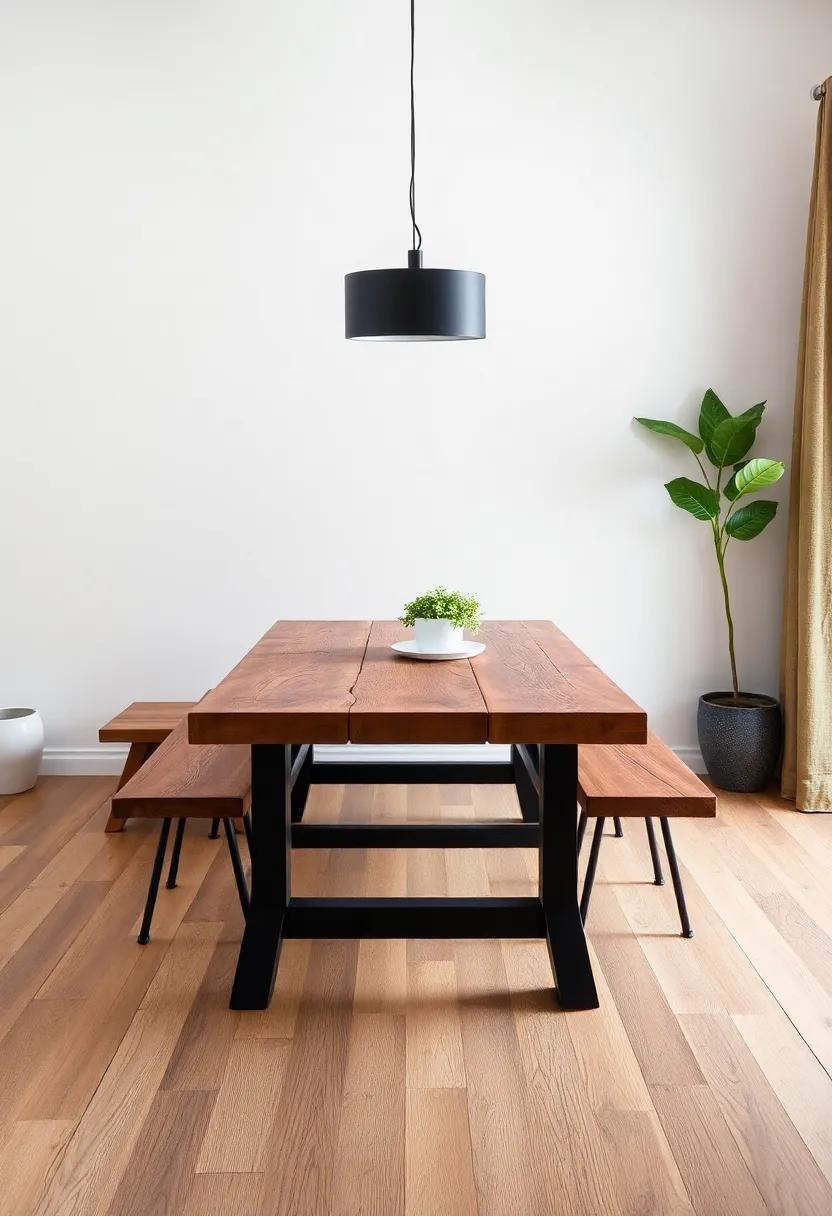
Build a Simple Farmhouse Table for a Modern Touch
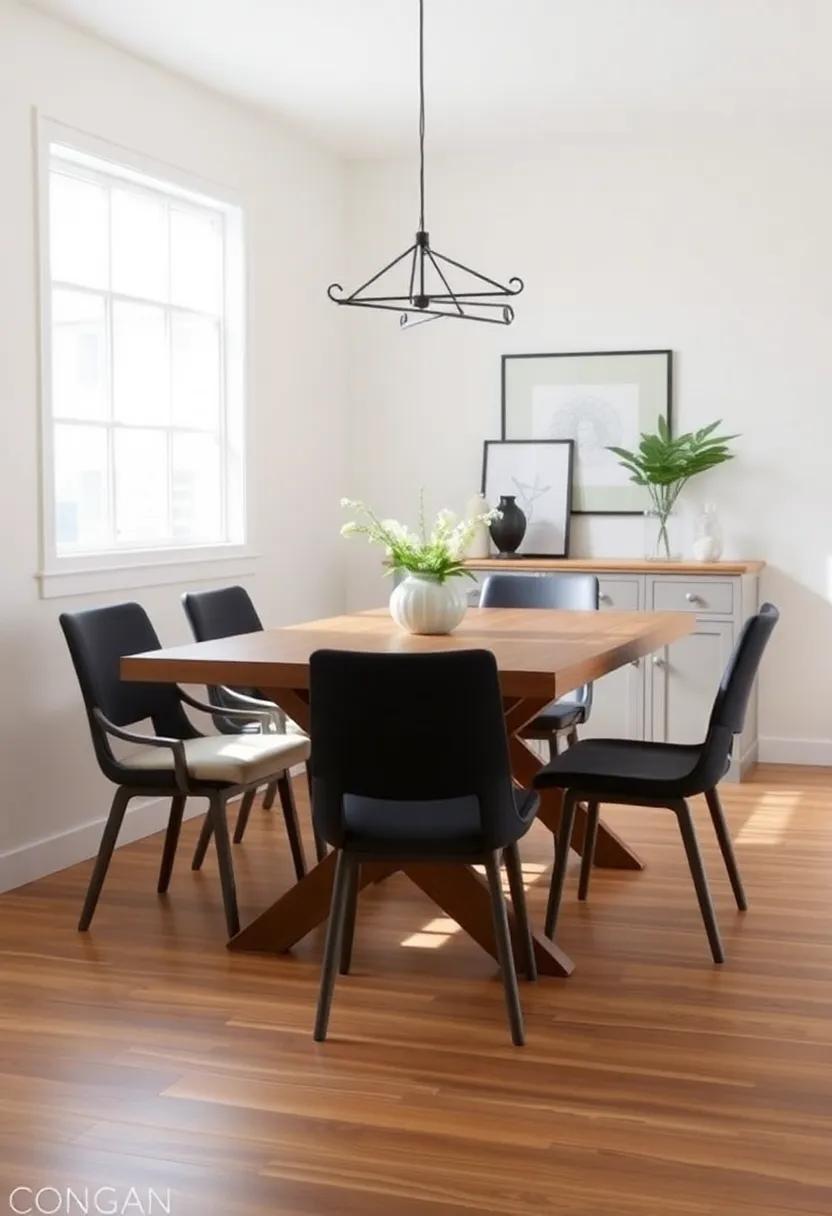
Creating a beautiful farmhouse table can be a rewarding project that seamlessly blends rustic charm with modern simplicity. Start by selecting high-quality materials—reclaimed wood works wonderfully for this project,offering character and sustainability. You’ll need basic woodworking tools like a saw,drill,and sander. Begin by cutting your wood to size; for a typical dining table, aim for dimensions around 72 inches long by 36 inches wide. This size not only provides ample space for family gatherings but also maintains a cozy aesthetic in your dining room.
Once your pieces are cut, assemble the tabletop by joining shorter wood planks together, using wood glue and screws. Next, add sturdy legs—you can opt for traditional straight legs or a more contemporary X-frame design to enhance stability. finish off your table with a wood stain that complements your decor. To protect the surface, apply a clear topcoat, ensuring the table withstands the test of everyday use. Consider adding a unique touch, such as decorative brackets or a painted base, to enrich the farmhouse style while keeping with a modern touch.
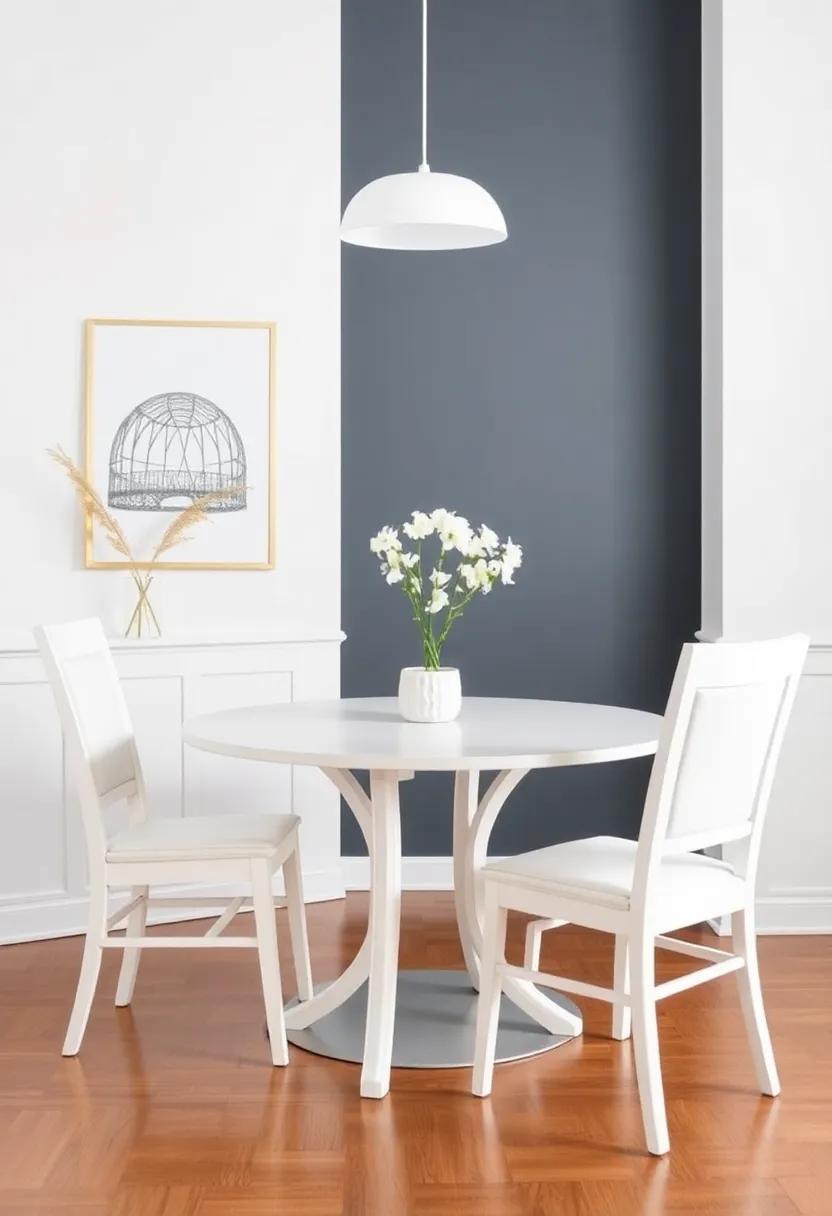
Incorporate a Mirror to Expand Visual Space
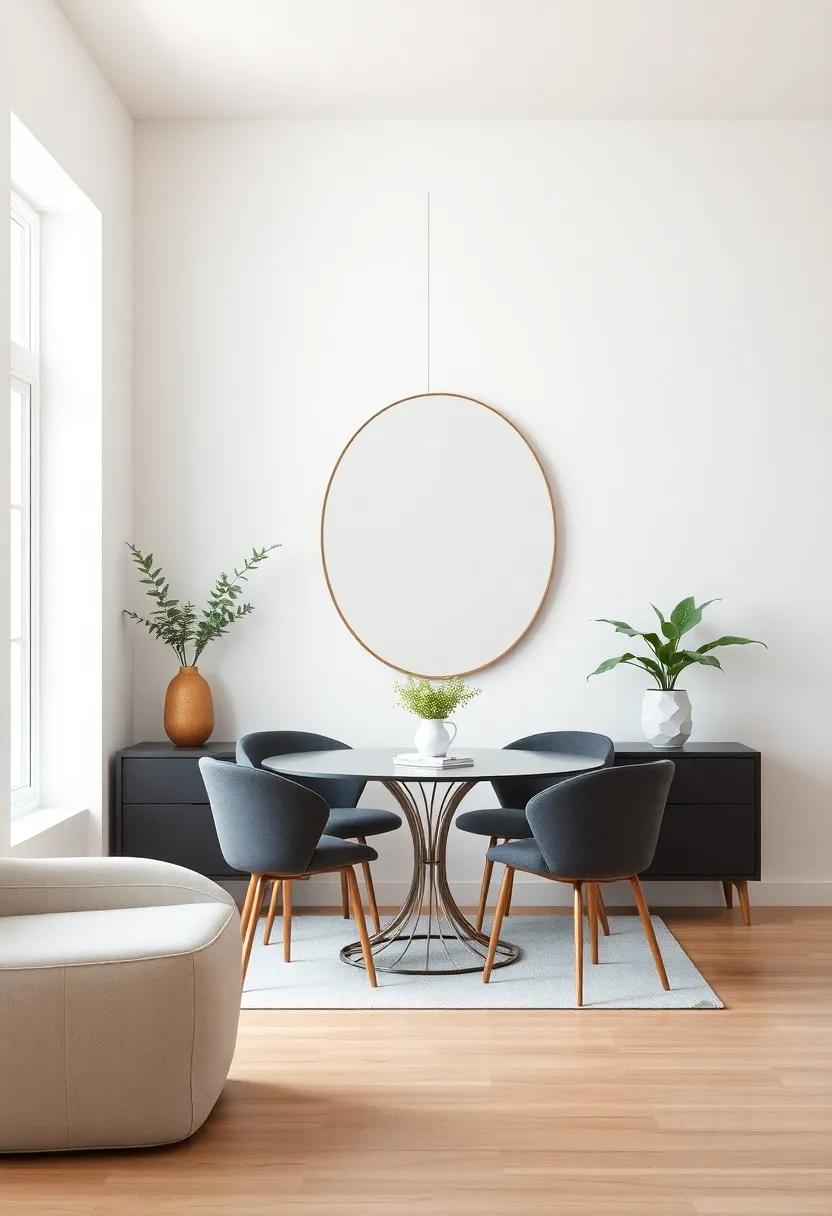
One of the simplest yet most effective ways to create an illusion of space in your dining area is by incorporating mirrors into your design. Mirrors reflect both natural and artificial light, making a room feel brighter and more open. You can opt for a large wall mirror to serve as a stunning focal point,or cluster several smaller mirrors together to form an eye-catching gallery wall. Consider using decorative frames that complement your dining room’s decor, as this will reinforce the aesthetic while providing a practical solution to expanding visual space.
Furthermore, the placement of your mirrors is crucial for maximizing their impact. Hang a mirror across from a window to reflect the view and enhance the sense of openness. Alternatively, position a mirror strategically behind your dining table to reflect the dining experience itself, adding depth and elegance to the atmosphere.To make the most of your mirrors,consider these creative ideas:
- Use a rounded mirror to soften angular room shapes.
- Incorporate mirrored furniture, like side tables, to complement the effect.
- try a vintage or antique mirror for a classic touch that tells a story.
- consider framed mirrors that match your dining chairs for cohesive design.
Style a Cozy Reading Nook in One Corner
Transform a corner of your dining room into a charming reading nook that invites relaxation and creativity. Begin by selecting a plush armchair or a cozy bean bag that speaks to your personal style. Surround it with soft textiles—think a warm throw blanket and a couple of decorative cushions in complementary colors. To create an inviting atmosphere, incorporate ambient lighting such as a stylish floor lamp or twinkling fairy lights draped nearby. A small side table can hold your favorite reads and a cup of tea, ensuring everything you need is within arm’s reach.
Next, enhance the space with thoughtful decor elements that reflect your personality. Consider a floating bookshelf to keep your literary treasures organized and on display. Add a small potted plant for a touch of greenery, which can also improve your well-being while you dive into pages. If you have the wall space, curate a gallery of framed quotes or artwork that inspires you. lastly, don’t forget to personalize the nook with photographs or souvenirs that spark joy, making this little corner not just a reading spot, but a true sanctuary of comfort.
Experiment with layered Rugs to Define Your Dining Area
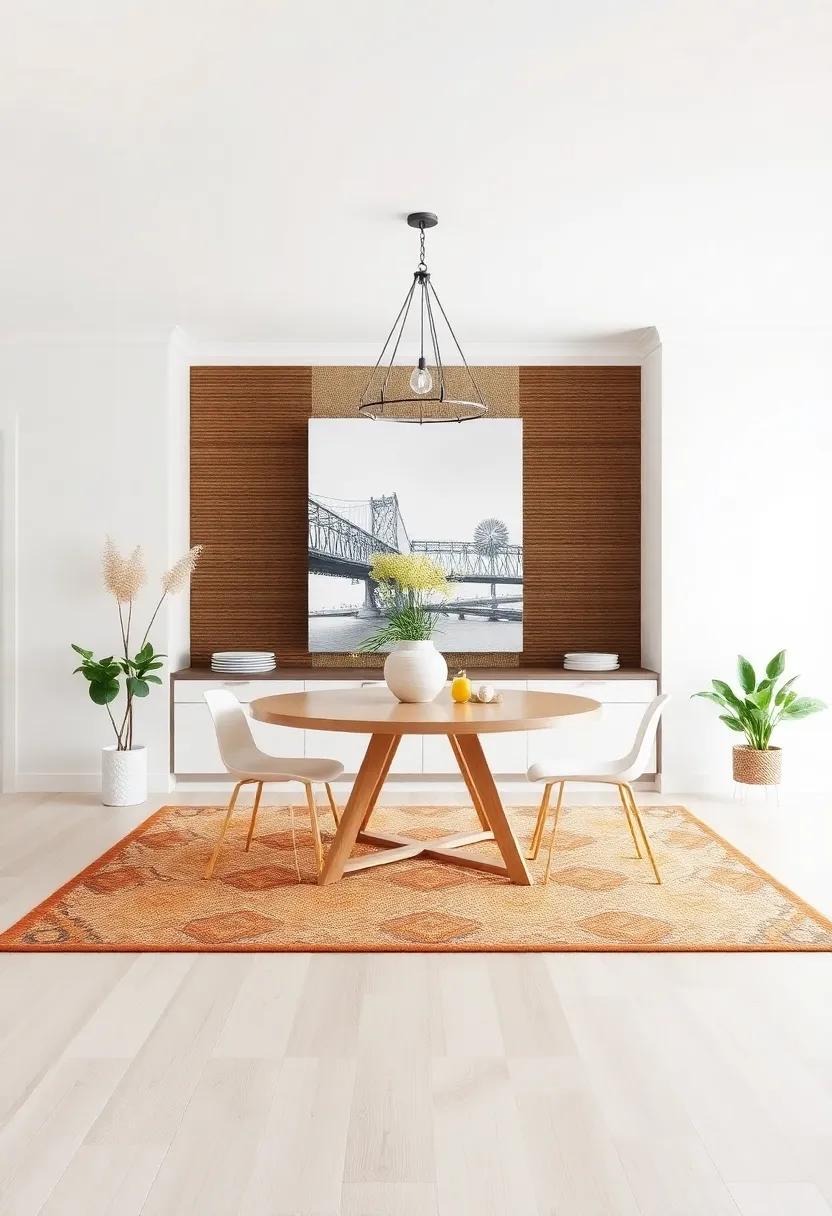
Layered rugs are not just for aesthetics; they also serve as a functional way to define distinct areas within your dining room. By combining textures, patterns, and colors, you can create a cozy, inviting atmosphere that makes every meal feel special. Start by selecting a large,neutral base rug to anchor the space,then play with a smaller,decorative rug on top to enhance visual interest. This could be a vibrant Persian or a shaggy style that contrasts nicely with your base rug. The key is to ensure the rugs complement each other in color and pattern while providing a soft, warm feel underfoot.
To achieve a harmonious look, consider the scale and proportion of the rugs. Larger rugs should extend beyond the dining table’s perimeter, while smaller accent rugs can add depth without overwhelming the space. Think about how you arrange your furniture; placing the legs of the chairs on the rugs can create a seamless transition. Here are a few pairs of complementary styles that work well together:
| Base Rug Style | Accent Rug Style |
|---|---|
| Neutral Jute | Colorful Kilim |
| Classic Gray Wool | Modern Geometric |
| Soft Beige Shag | Textured Cotton |
Key Takeaways
As we wrap up our journey through these 29 inspiring DIY dining room projects,we hope you feel invigorated and ready to embark on your own creative endeavors. Each idea offers not just a way to enhance your space but also an opportunity to pour your personality and style into one of the most beloved areas of your home. Remember, a dining room is more than just a place to eat; it’s where memories are made, conversations are sparked, and connections are nurtured. Whether you choose to refresh your décor, introduce new furniture, or tackle a bold renovation, each project is a step towards creating a space that reflects your unique taste and lifestyle. So gather your tools, invite a friend or two, and start transforming your dining room into a haven of comfort and style. Happy crafting!
As an Amazon Associate I earn from qualifying purchases.